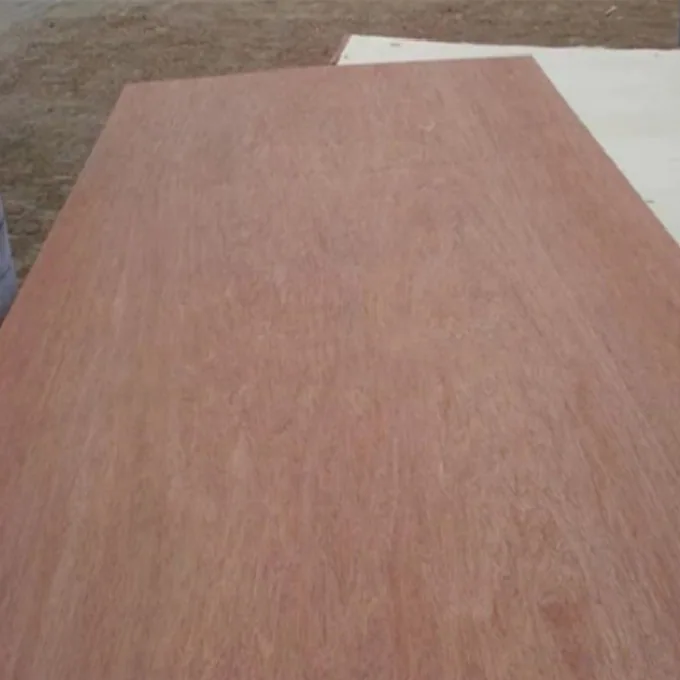
Retained furniture inserts
Provide the groove or rebate, final outline and assembly route. Include the finished frame, bead or packing and intended face level. Use the completed joint to set the panel's actual dimension limits.
PLYWOOD & MDF · CHINA

OUR FACTORY · PRODUCT DETAILS
Warm mahogany faces, shaped for the furniture you make.
Bring a warm mahogany face to your furniture inserts, display surrounds and visible cabinet backs. We manufacture 6mm mahogany-faced plywood and cut components around your design. Send a sketch, opening detail or finish reference; our factory team helps select the face and reverse, plan the routed edges and develop a sample that fits your frame or carrier.
Available to order · 10–15 days production · Container shipping
CONSTRUCTION & SUPPLY CONDITION
| Nominal panel thickness | 6mm overall plywood panel; actual layup and supplied thickness limits agreed for the order. |
|---|---|
| Sheet and component sizes | 1220 × 2440mm within the range or cut to size; select the format with the chosen 6mm construction. |
| Mahogany appearance | Reddish-brown face selected by veneer identity, grain and the accepted finished range. |
| Grain and cut | Straight or interlocked figure; selected quarter-cut veneer can show a striped effect. |
| Veneer identity | Natural veneer species or selected engineered appearance named in the quotation. |
| Reverse selection | Concealed reverse or a separately selected visible back, with its own finish and appearance requirements. |
| Core and layup | Construction selected for the component, exposed edges, machining and intended service. |
| Thickness and preparation | Agreed upper and lower limits, measurement stage, face veneer allowance and supplied surface preparation. |
| Dimensional acceptance | Sheet or component size, squareness and flatness limits stated with the measurement method. |
| Openings and corners | Finished opening dimensions, internal radii, remaining webs, visible edges and any covering trim. |
| Receiving detail | Groove or rebate dimensions, support, retention, side clearance and finished face level. |
| Bonded assemblies | Carrier, actual reverse, adhesive process and complete front and rear build. |
| Mass and moisture | Actual panel mass and supply condition confirmed for the selected construction. |
| Service and documents | Loading, exposure, emissions, sourcing and other project requirements identified with the destination. |
| Samples and matching | Shaped component or fitted corner, finished face and reverse references, part IDs and matching groups. |
| Supply and packing | Full sheets, machining blanks or completed parts, quantities, finish scope, spares, labels and edge protection. |
Choose the construction, finish and size for your project. We’ll bring the selected options and finished tolerances together in your quotation.
6MM MAHOGANY · FURNITURE & INTERIOR COMPONENTS
Bring a reddish-brown mahogany finish to cabinet inserts, shaped display panels and supported furniture backs. Our 6mm mahogany-faced plywood can be selected around your visible sides, routed outline and receiving frame. Send a sketch or finish reference; our factory can help develop the veneer, construction, sample and supplied processing for the parts you need.
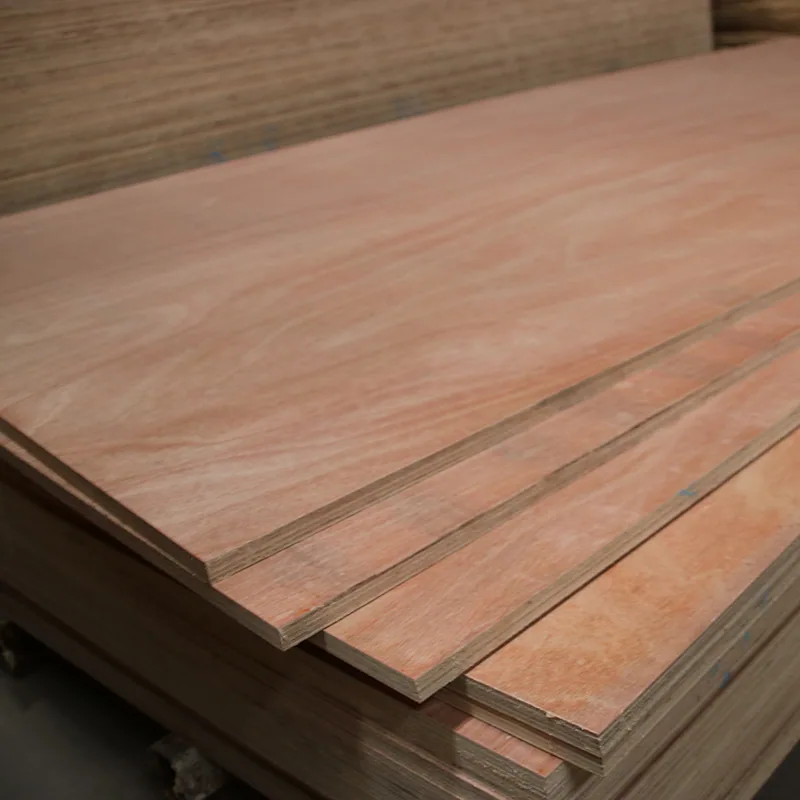
Select straight or interlocked grain, or a striped figure in selected quarter-cut material. Name the veneer species or accepted material description and cut with the appearance reference so the same choice follows into the quotation.
For natural veneer, agree the permitted variation, leaf arrangement and visible features. For an engineered mahogany appearance, name the offered material explicitly. Select the inner construction and reverse alongside the decorative face.
View striped material upright under the project's lighting and from different positions, keeping top direction consistent across neighbouring parts. Compare changes with viewing angle against fixed marks or patches when reviewing the finished appearance. Select the figure and preparation allowance with the actual face veneer, then prepare the coated sample.
Give any visible reverse its own tone, grain, repairs and finish requirements. A door insert may expose its back when opened, while a freestanding display shows both sides. Select a concealed utility or bonding reverse for its separate role.
| Part condition | Face decision | Reverse or edge decision |
|---|---|---|
| Framed insert | Position figure inside the visible frame opening. | Identify any reverse view when opened; agree hidden edge preparation. |
| Double-sided display | Select the accepted finished tone and grain group. | Specify the second visible face independently and review exposed cut edges. |
| Bonded lining | Coordinate adjoining panels, seams and the final coating. | Choose a reverse compatible with the carrier and adhesive process. |
| Replacement furniture panel | Compare with an actual aged, finished reference. | Match the existing edge termination and the views that remain visible. |
Finish a corner with the surrounding frame, lipping or moulding to compare the veneer and adjoining material together. Label front, reverse and top direction on the accepted reference. For coordinated groups, mark component positions on the elevation and select matching spares with the same group.
SELECT THE COMPLETE SIX-MILLIMETRE COMPONENT
Start with the final part, showing the face, reverse, grain direction, openings and exposed edges. Identify whether it sits in a frame, over supports or on another panel. The selected core, layup and bond can then be quoted with the machining and assembly requirements.
Provide the groove or rebate, final outline and assembly route. Include the finished frame, bead or packing and intended face level. Use the completed joint to set the panel's actual dimension limits.
Mark the opening boundary, internal corners and narrow sections that remain. Identify cut edges that show, receive a coating or sit under trim. Include those features in the selected core and face sample.
The range includes 1220 × 2440mm sheets and cut-to-size supply, with other configurations at 3, 9, 12, 15 and 18mm. Select this 6mm nominal construction with its actual layup, dimensions, preparation and agreed limits.
Coordinate appearance across different thicknesses while keeping each machining and inspection schedule. Compare 4mm mahogany plywood for thinner inserts or 12mm mahogany plywood when that thickness suits the component.
Where a back braces furniture, a drawer bottom carries contents or fittings attach to the part, include the loads, spans, supports and connections. Select the complete construction around that duty together with the mahogany appearance.
FURNITURE, DISPLAYS & SUPPORTED LININGS
Show the receiving frame, visible opening and completed thickness fit. Coordinate grain with neighbouring fronts and mouldings; include load and support details when the part carries contents.
Identify the reverse seen when the furniture opens or stands in the room. Include the edge joint and fixing detail where the back also braces the cabinet.
Send internal corner radii, remaining webs and trim coverage. Sample the smallest feature, exposed core and handling of the surround after its centre is removed.
Plan supports, seams, returns and service openings with the face sequence. Coordinate finished levels at joints and trims, and select the bond and finish for the interior conditions.
Provide the carrier, reverse preparation and adhesive process. Use the front and rear build in a real edge or corner sample to review appearance, bond, level and flatness.
Send the existing furniture's finished reference and receiving dimensions. Compare the new coated veneer with aged adjacent parts and sample the shaped detail.
For wet, exterior or marine use, include the exposure with the full construction brief. For fire, emissions or other project needs, provide the required standard, rating or destination. We can discuss the core, bond, finish and relevant documents for that selected configuration with the quotation.
PANEL, COATINGS & RECEIVING FRAME
Agree the actual upper and lower thickness limits for the selected 6mm order and the stage at which they are measured. For the completed fit, include sanding, front and reverse coatings, any retained layer and the rebate depth measured to the frame surface. Specify a flush face, deliberate recess or raised detail.
Finished face level relative to the frame = bare panel thickness + front coating + reverse coating + retained layer − rebate depth.
A positive result is proud; a negative result is recessed.
For the fit calculation below, use panel-thickness inputs of 5.80, 6.00 and 6.20mm, dry front coating of 0.12mm, reverse coating of 0.08mm, retained packing of 0.25mm and a 6.40mm rebate. These values define the assembly calculation. Agree the supplied panel limits and process values with the component drawing.
| Bare panel | Coated panel | Installed stack | Face level relative to frame |
|---|---|---|---|
| 5.80mm | 6.00mm | 6.25mm | −0.15mm · recessed |
| 6.00mm | 6.20mm | 6.45mm | +0.05mm · proud |
| 6.20mm | 6.40mm | 6.65mm | +0.25mm · proud |
The three panel inputs give a 0.40mm face-level spread while the other layers and rebate stay fixed. For the actual flush detail, include the variation of every contributing dimension and compare the endpoints with its permitted step. Use the retained thickness under the designed condition for any compressible layer.
Record pocket width and height, visible opening and final panel outline separately. Include frame limits, lateral clearance and allowed movement in both axes. Define the retained overlap and how the part enters: a removable bead, open rebate or a frame assembled around a grooved insert.
For bonded parts, identify the actual carrier, reverse preparation, existing coatings and adhesive system. Follow the chosen preparation, pressure and curing instructions. Review the front and rear build together on a representative bonded component after conditioning, checking joint level, flatness and edge lifting beside adjoining parts.
OPENINGS, INTERNAL CORNERS & EXPOSED EDGES
Send the finished boundary, show face, grain direction and edge treatment for surrounds, grilles or access panels. Include the smallest internal corner and areas needing support. Cut those features in the selected core to review the actual exposed edges and narrow webs.
A round router cutter leaves an internal radius. Show the finished radius and any square-ended mating component so the detail can use a compatible corner, hidden relief or separate finishing operation. Sample the joint and visible edge in the actual plywood.
The routing layout below uses a 560 × 760mm surround with a centred 420 × 560mm opening and R12 internal corners. The straight side margins are 70mm, with 100mm at the top and bottom. Select supports and service duty with the finished component.
With a 6mm-diameter cutter following inside the finished opening and no further finishing offset, its centre runs 3mm inward from the boundary. The tool-centre path is 414 × 554mm with R9 corners.
A complete through-cut leaves an ideal centre offcut of 408 × 548mm with R6 external corners. This geometry is before holding tabs, edge damage or subsequent trimming. The cutter removes material on both sides of its centre path.
| Cutter diameter | Tool-centre path | Ideal centre offcut | Offcut corner radius |
|---|---|---|---|
| 4mm | 416 × 556mm · R10 | 412 × 552mm | R8 |
| 6mm | 414 × 554mm · R9 | 408 × 548mm | R6 |
| 8mm | 412 × 552mm · R8 | 404 × 544mm | R4 |
These offsets compare cutter geometries for the same finished opening. Select the tool with its effective diameter, holding method and required edge quality. A finishing pass or extra offset changes the retained centre. Identify whether the path runs inside, outside or on the design line and which material belongs to the finished part.
With the 6mm cutter, the centre piece is 12mm smaller than the opening in both dimensions. Centred inside it, the straight sides have 6mm gaps before further allowances. A close-fitting removable cover needs its own clearance, support, edge treatment and blank or machining path.
For offcuts assigned to other parts, check their usable size, grain and damage allowance before reducing those purchase quantities. Identify the centre pieces separately from accepted covers or replacement components.
Define how the surround and centre are held during the final cut. Review cutter sequence, sacrificial support and holding-tab removal on the chosen 6mm construction. Inspect both faces for breakout and the core along the opening, including the smallest inside corner.
Select exposed plywood, paint, solid lipping or covering profiles with their preparation and build. Where trim projects into the hole, keep the machined opening and completed clear opening separately dimensioned. Trial the coating on the cut edge and corner; agree face-veneer allowance before sanding and review glue visibility or local colour differences.
Connect hardware through its designed support and protect narrow webs and unsupported corners during lifting and packing. Keep the accepted edge and corner process with the component drawing.
WHOLE BLANKS, COMPLETE SURROUNDS & SPARES
For 24 finished surrounds at 560 × 760mm, allow 5mm profile trim at every outer edge to give 570 × 770mm blanks. Routing the opening later retains the same starting-blank requirement.
Use 1220 × 2440mm sheets, 10mm outside-edge reserves and 3mm kerfs between blanks. The usable rectangle is 1200 × 2420mm. Keep the 770mm dimension along the long grain direction, with no 90-degree rotation, and allocate an acceptable face to each grid position.
Across: 2 × 570 + 3 = 1143mm.
Along: 3 × 770 + 2 × 3 = 2316mm.
Regular-grid yield: 2 × 3 = 6 blanks per sheet.
For 24 surrounds: 24 ÷ 6 = 4 sheets before additional allowances.
This is a fixed-direction saw-cut grid. For CNC-routing the outside profile from a full sheet, set inter-part spacing from the actual cutter, workholding and finishing process, then recalculate its layout.
| Material stage | Quantity and dimensions | Single-face area | Meaning for the order |
|---|---|---|---|
| Nominal full sheets | 4 × 1220 × 2440mm | 11.9072m² | Starting sheet area before cutting and selection losses. |
| Machining blanks | 24 × 570 × 770mm | 10.5336m² | Required rectangles including final outer-profile trim. |
| Finished outer rectangles | 24 × 560 × 760mm | 10.2144m² | Outside profiles before subtracting the central openings. |
A 420 × 560mm rectangle contains 0.2352m². Four R12 corners reduce the opening area to W × H − (4 − π) × R². Using metres gives approximately 0.235076m² per opening.
The remaining single-face area is approximately 0.190524m² per surround, or 4.572567m² for 24 surrounds, calculated before rounding the individual result. Purchase from the full blanks above; the removed centres form a separate material stream.
For coating quantities, add the reverse and exposed edges to these single-face areas. The centre offcut is smaller than the opening because of the cutter channel. Inspect and count any reusable centres separately.
The four-sheet layout uses six acceptable positions per sheet with no spare blank. At an allocation of five accepted surrounds per sheet, 24 parts require 5 sheets. Select that allowance from the actual face layout and process needs for the order.
Review both sides before allocating double-sided parts. Keep matching IDs through cutting, coating and packing, and select spares for the particular group they may replace.
One nominal 1220 × 2440 × 6mm sheet contains 0.0178608m³ of panel material; four contain 0.0714432m³. Use the selected plywood mass or measured sheets for freight, together with the agreed moisture condition and actual pack dimensions.
Full sheets, oversized blanks and finished surrounds need different protection. Include the openings, narrow sections, finish and unloading requirements in the export packing brief.
A SHAPED PART WITH ITS RECEIVING DETAIL
Request the sample around the smallest important corner, a representative exposed edge and the planned coating. Use the selected 6mm core and face construction. Finish both sides where both remain visible.
For retained inserts, include a receiving corner with its bead or packing and check face level, side clearance and overlap after finishing. For bonded work, include the actual carrier, reverse and adhesive process. Add a complete or representative shaped part to assess handling, support and appearance beyond the local corner.
Retain the accepted appearance range, drawing revision and construction with the sample. If the core, preparation, tooling or coating changes, review the affected feature before using that reference for the next order.
SELECTED MATERIAL, FIT & COMPLETE BATCH
| Inspection item | What to inspect | Reference to retain |
|---|---|---|
| Selected construction | Actual 6mm layup, thickness limits, sheet size and supplied preparation. | The quoted configuration and measurement stage. |
| Face and visible reverse | Tone, grain group, veneer joints, permitted repairs and finished appearance. | Labelled front/reverse samples and component positions. |
| Routed opening | Finished boundary, corner radii, core exposure, breakout and remaining webs. | Drawing revision, tooling trial and accepted edge detail. |
| Finished fit | Coated thickness, face level, lateral clearance and retained overlap. | Measured frame, bead or packing and the assembled sample. |
| Finished batch | Quantity, matching sequence, coating consistency and handling damage. | Part identifiers, group labels, spare quantities and packing list. |
Agree methods for thickness, flatness, squareness and moisture condition. Identify whether measurements refer to a loose sheet, retained component, bare panel or coated part. For openings, measure the finished boundary on the drawing and any smaller clear opening formed by trim.
Keep tooling and process identity with the accepted corner sample. Review the affected feature when a later tool or process change alters the edge finish or fit.
Store sheets flat on suitable supports in protected conditions, keeping abrasive particles away from the face and avoiding uneven wetting. Support the remaining surround when lifting it; protect internal openings from local pressure in the pack.
Retain front, reverse, top-direction and group labels after cutting. Quote the same supplied stage across offers: full sheets, machining blanks or completed parts. Include drawings, quantities, matching spares, documents, OEM labels, destination and timing through our enquiry form or sales@plywoodsupplier.cn. We can complete the sample work, machining scope, minimum order quantity and production brief with you.
For coordinated thickness selections, use the mahogany plywood sheet range. Compare other wood appearances in the decorative veneer plywood collection with the same component drawing and service requirements.
PLAN YOUR PANEL ORDER
Choose the sides your customer sees, then develop the opening and receiving detail with the selected core. We help carry those choices into a finished component sample, a clear machining scope and a quotation for the supply you need.
6mm Mahogany Plywood
A shaped mahogany component in its receiving detail
Make the tightest important corner and a representative exposed edge in the selected construction. Add the actual frame or carrier and finish the visible sides, then review the appearance, clearance and face level as one component.
Review this product’s sample planFor a quotation, add your quantity, destination and required timing. You can start with the details you already have.
PanelSource · Xuzhou PanelSource Co., Ltd.
https://www.plywoodsupplier.cn/product/6mm-mahogany-plywood/
sales@plywoodsupplier.cn
SAMPLES & ORDER PLANNING
Tell us your quantity, sample needs and target delivery date. We’ll put the price, payment terms and production schedule into your quotation.
DOCUMENTS & ORDER SUPPORT
We help your purchasing team gather product reports, inspection records and packing documents for your order.
Product reference: 6mm Mahogany Plywood — specification.
Share the material, thickness and test standard your project requires. Our factory team will help you select the product reports and documents for your purchase.
We can plan production and inspection around your panel specification, with dimensional checks, recorded readings and packing photographs for your order.
Plan the inspection scopeWe prepare packing details, pack quantities and dispatch documents for your order. Share the destination and receiving requirements so our team can help plan delivery.
Review the delivery scopeStart with your application or panel reference. Our team will help with the specification and documents.
PRODUCT-SPECIFIC QUESTIONS
Furniture inserts, shaped display surrounds, visible backs and supported interior linings are common enquiries. Send the outline, openings, visible sides and receiving detail. We help select the face and construction around the component, with loads, support and fixings included where the part has a structural role.
It describes the selected decorative face on a plywood construction. We identify the veneer species or engineered appearance, then select the core and reverse separately. This lets the quotation connect the look you want with the material used in your finished part.
Yes. The range includes 1220 × 2440mm sheets and cut-to-size supply, selected with the actual 6mm construction. Specify full sheets, oversized blanks or completed parts, including openings, radii, edge finish and any machining or coating left for your workshop.
Use the receiving frame or finished assembly requirement to agree the supplied limits and measuring stage. Include coatings and any retained layer when checking final fit. The 5.80, 6.00 and 6.20mm values in the face-level calculation are its design inputs; your order carries the selected material limits.
Send a finished reference or photograph showing the tone and figure you want. Straight or interlocked grain can be selected, and some quarter-cut faces show a striped appearance. Compare the offered veneer with its intended coating and viewing direction, then retain the selected range for adjoining components.
Yes. Identify the sides visible in use and select the reverse tone, figure, permitted features and finish with the show face. A freestanding display or visible cabinet back benefits from a two-sided sample reviewed with its exposed edges and surrounding materials.
Check the complete installed thickness against the actual rebate. In the page’s fit calculation, a 6.00mm panel plus 0.12mm front coating, 0.08mm reverse coating and 0.25mm retained layer totals 6.45mm. Against a 6.40mm rebate it stands 0.05mm proud. Bring your frame and finish dimensions into the sample to achieve the level you want.
Yes. Send the finished boundary, smallest corner, remaining webs and visible edges. A round cutter leaves an internal radius, so we coordinate the radius, a concealed relief or a separate finishing operation with your mating part. The component sample includes the important corner in the selected veneer and core.
Plan the cover as its own component. With a 6mm cutter following the inside of a 420 × 560mm opening, the ideal retained centre is 408 × 548mm before tabs or further trimming. Specify a cover’s clearance, support, edge detail and appearance so its blank and machining path produce the fit you need.
For the 570 × 770mm blanks shown, a 1220 × 2440mm sheet with 10mm perimeter reserves and 3mm inter-blank kerfs gives six blanks with fixed grain. Four sheets provide the geometric count for 24 parts. Add the actual face selection, machining and spare-part allowances; routing the central opening does not reduce the required starting blank.
A nominal 1220 × 2440 × 6mm panel contains 0.0178608m³. Multiply that volume by the density of the selected plywood construction, or use measured sheet mass. We can confirm the selected panel and packing details for transport planning.
Send the actual carrier, adhesive process and intended exposure. We help select the core, panel bond and complete construction for the use, with the required documents. Develop the front and rear build together and review a bonded component with its edges, openings and final finish.
Include the smallest important opening or corner, a representative exposed edge and the planned coating. For a retained insert, add a receiving frame corner with the bead or packing; for bonded work, include the actual carrier and adhesive. Review visible sides, clearance, face level and edge quality together.
Send a sketch or finished reference, outline and opening sizes, visible sides, quantities and destination. We help complete the veneer, construction, machining and sample brief. Available to order, with 10–15 days production, container shipping, freight terms per order and a 180-day after-sales warranty.
CONTACT OUR FACTORY
Send the sketch, furniture photo or finished drawing you have. We help complete the face, reverse, routed details and receiving fit, then quote sheets or components around the sample and your production needs.
Have a routed outline, frame section or two-sided finish reference? Email it to sales@plywoodsupplier.cn. Start with the details you have; we’ll help you work through the rest.
Tell us your panel, dimensions, quantity and destination port.