Birch faces and cut sizes that fit the parts you are making.
Bring pale birch grain to cabinet backs, framed inserts and supported interior linings, or develop a clean-edged routing pattern. We manufacture 6mm birch-faced plywood in four sheet lengths up to 3660mm. Send your part outline, frame sketch or finished reference; our factory team can select the faces and core, develop the fitted or machined sample, and quote sheets or cut parts for your order.
Choose the construction, finish and size for your project. We’ll bring the selected options and finished tolerances together in your quotation.
6MM BIRCH · FITTED PANELS & ROUTED COMPONENTS
Select the birch face your component will show
Bring a pale birch surface to cabinet backs, framed inserts, supported linings and routed parts with our 6mm birch-faced plywood. Choose the face and reverse around the finished component, then select the core, receiving fit and sheet length. Our factory can develop a corner or machining sample and quote sheets or cut parts for your order.
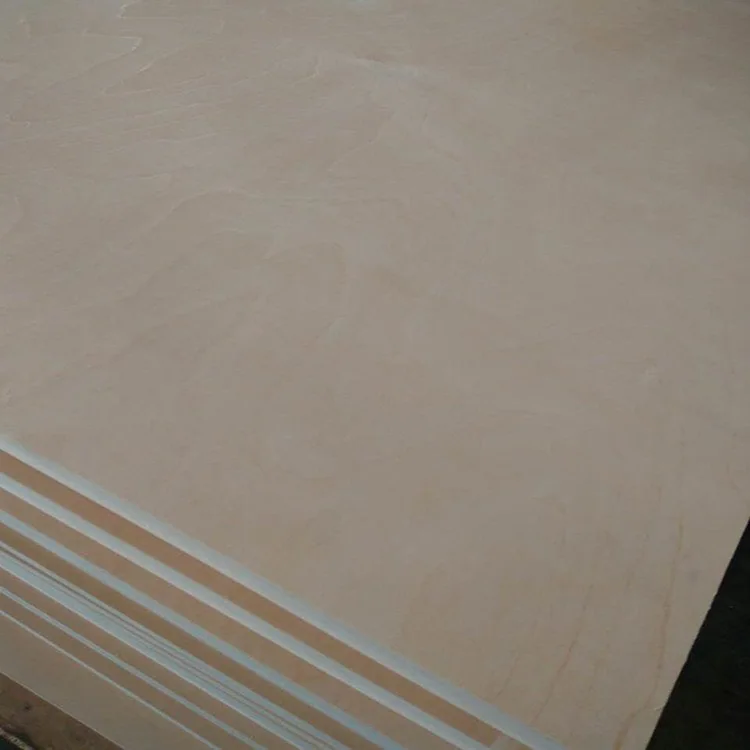
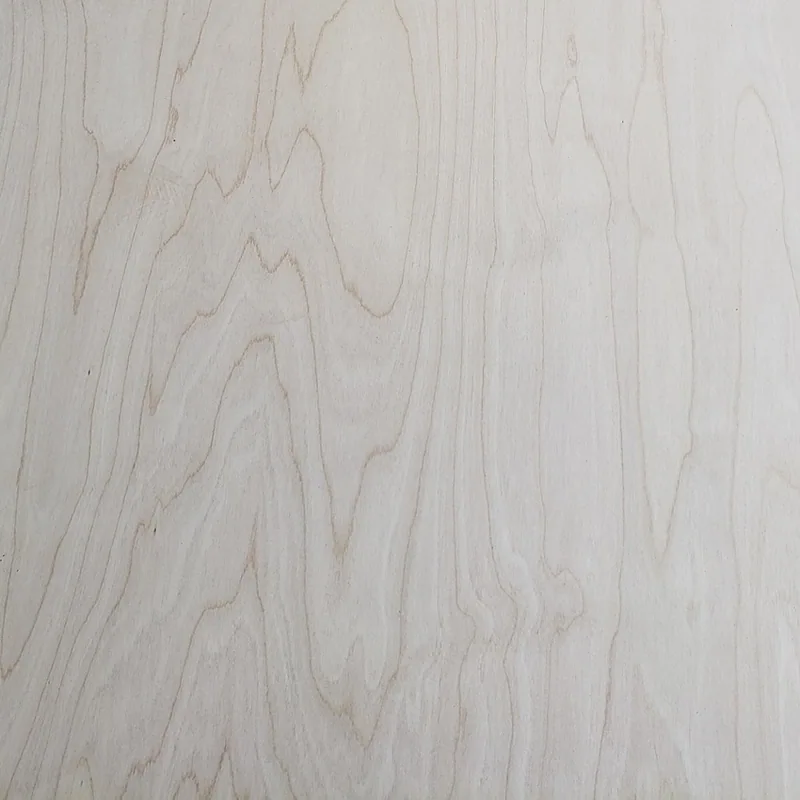
Pale birch grain for visible inserts and adjoining panels. Select the face group under the intended clear, stained or painted finish.
Define the views and finish
Mark the show face and the side visible inside the cabinet. Select grain and permitted repairs across the complete clear-finished insert; for a painted back, review preparation and the coated surface. Include the reverse where removal or use exposes it.
Compare adjoining panels as a group under the intended finish, with their top direction marked. Keep that relationship in the cutting layout and pack labels so the selected faces remain together through assembly.
Select the internal construction with the face
Identify the core species and veneer arrangement, including birch throughout or a specified ply count where required. Choose exposed-edge appearance on a machined sample. Our birch face-grade guide helps define the appearance and permitted repairs for the visible surfaces.
This configuration combines a ±0.5mm thickness tolerance with four 1220mm-wide sheet lengths. If your purchase starts with a defined BB face requirement, compare the separate 6mm BB birch plywood configuration and select its own appearance and supply specification.
SUPPORT, RESTRAINT & SELECTED THICKNESS
Choose how the panel sits in the finished assembly
Identify the receiving frame, backing or clips before selecting the panel. A perimeter-retained insert, bonded furniture skin and removable cover each have a different support and assembly brief.
Start with the installed arrangement
Arrangement
What to define
What the sample should show
Panel in a frame
Clear opening, retained edge, groove or rebate and assembly route.
Fit after finishing, retained edge engagement and appearance at the frame.
Skin bonded to a backing
Backing material, adhesive process and the treatment of the opposite side.
The representative bonded assembly after the intended curing and finishing process.
Panel on battens or rails
Support positions, edge joints, openings and attachment detail.
Surface alignment and behaviour of the full-size supported component.
Loose or intermittently clipped panel
Unsupported dimensions, handling, removal and any applied loads.
The completed restraint, supported dimensions and intended use.
At equal area, moving from 3mm to 6mm doubles nominal material volume; moving from 6mm to 9mm adds 50%. Mass follows those ratios at equal density. Select stiffness, support spacing and fixing requirements with the actual construction and complete assembly.
Compare 3mm birch plywood for thinner decorative parts and 9mm birch plywood for a thicker fitted panel. Carry any change of thickness through the receiving channel, clips, finished face level and component dimensions.
CABINET BACKS, INFILLS, LININGS & PATTERNS
Start with the part your workshop is making
Cabinet backs and removable covers
Show whether the panel fits a rebate, enters grooves or overlaps the rear of the carcass. Keep the visible opening separate from the full panel outline and retained edge. Include service openings and the fixing schedule if the back contributes to the cabinet's bracing.
Plan access after installation: a panel captured on four sides may enter during assembly, while a face-retained cover can use fixings or a removable strip. Check removal and refitting on the finished corner.
Framed furniture and door infills
Specify the frame carrying the hinges or edge connections and how the insert is retained: floating, bonded or mechanically held. Include coating, bedding and the reverse seen when a door opens. Review the panel and retainer together at the finished face level.
Supported linings and furniture skins
Place joints over the planned supports and coordinate them with the grain layout. The longer formats can reduce a joint along a continuous component; include handling and support for that length.
For a bonded skin, specify the backing, adhesive process, pressing and opposite-side treatment. Review the completed supported assembly with the intended finish and any fire, acoustic or structural project requirements.
Templates, patterns and routed display parts
Provide the guide contact, locating holes, clamps, tightest radius and narrowest bridge. Select a clean reference edge for a reusable pattern and retain its master outline for wear checks.
For decorative display parts, include apertures, retained tabs and visible routed edges in the finished sample. Keep support through machining and handling around narrow necks and detailed openings.
BARE PANEL RANGE & FINISHED JOINT
Coordinate the 5.5–6.5mm panel with the receiving detail
The ±0.5mm tolerance around nominal 6mm gives 5.5–6.5mm before a separately specified finish. Send any tighter finished fit requirement with the measuring condition, coating and receiving detail.
The following face-level calculation seats the bare panel directly in a 7.0mm-deep rebate, with no bedding, coating or rebate-depth variation.
Panel seated in a 7.0mm-deep rebate
Panel thickness
Depth minus panel
Face below frame
5.5mm
7.0 − 5.5
1.5mm
6.0mm
7.0 − 6.0
1.0mm
6.5mm
7.0 − 6.5
0.5mm
Across the panel range, the face position changes by 1.0mm. For a flush face, coordinate the panel, rebate depth and retained finish or bedding build in the completed corner. Include the available decorative-veneer preparation allowance when deciding the machining route.
Dimension groove width, depth and engagement separately
The groove width receives the panel thickness; its depth provides edge engagement. Panel width and length follow the opening, retained perimeter and assembly clearance. Put each dimension on the drawing and check how the full panel enters the smaller visible opening.
Using the exact inch conversion, 1/4 inch = 6.35mm. State the required metric dimension and limits for a drawing specified in inches. For an existing channel, use its measured size and the intended finished panel range.
CUT FACES, ROUTED EDGES & BLIND FEATURES
Develop the outline in the selected core
Read machining and workshop guidance
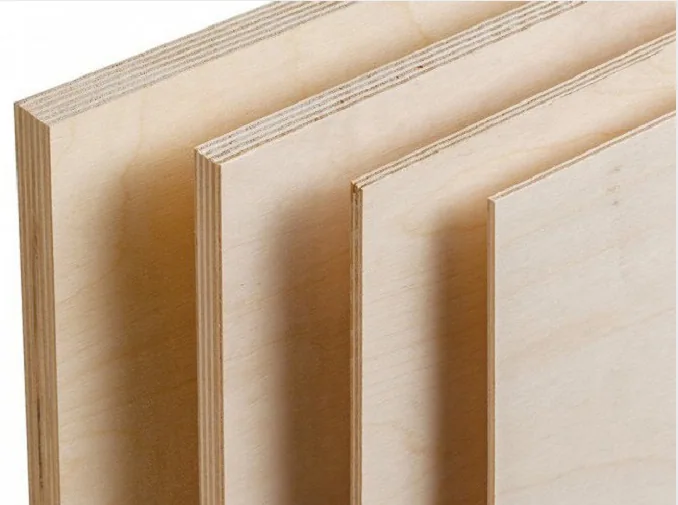
Birch-faced panels with layered cut edges across different thicknesses. Choose the core and machined-edge appearance for the selected 6mm construction.
Review the edge your part exposes
Include a straight edge, curve and aperture in the machining sample. Review internal veneer joints, local gaps and the narrowest released section, then compare the bare edge with the intended sanded or sealed finish.
Mark a profile's radius and position with the decorative-face preparation allowance. Where it enters the core, review the exposed material and colour as part of the finished appearance.
Support the face and offcut
Support the sheet and offcuts through the final cut. Review entry and exit faces, cross-grain edges and drilled openings, then retain the successful face orientation and scoring setup with the cutting list.
For CNC work, plan workholding as apertures and outer contours are released. Include tab or retained-layer removal and the final edge check while preserving the allowance needed for the receiving frame.
Calculate the remaining section
At the 5.5mm minimum, a 3mm-deep feature leaves 5.5 − 3 = 2.5mm; a 4mm feature leaves 5.5 − 4 = 1.5mm. A 6mm-deep cut passes through that minimum section.
Include drill points, countersinks and intersecting cuts in the deepest geometry. Select the required remaining section with the actual connection; provide the supporting frame or backing where the hardware needs more material.
Fit the internal corners
A cylindrical cutter leaves a radius at an internal corner. Coordinate that radius with the mating tab or its designed relief. Include small bridges between openings in the selected layup and finishing trial, with support during machining and release.
Develop a curved component
Send the required radius, curve direction, supports and forming process. Select the appropriate panel construction for that shape and review the completed formed assembly, including its surface, bond and retained shape.
GUIDE-BUSH OFFSET & PATTERN CONTACT
Set the template outline from the required cut
A guide bush follows the pattern edge while the cutter runs inside the guide. The diameter difference creates an offset, which changes the template size needed for an internal opening or an external part.
For the geometry below, use a 16mm outside guide diameter and a 6mm cutting diameter. The template-to-cut offset is (16 − 6) ÷ 2 = 5mm. Confirm the actual guide, cutter and contact arrangement with the selected tool.
Internal template openingA 90mm opening gives an 80mm routed opening: 90 − 5 − 5 = 80mm.External circular patternA 90mm pattern leaves a 100mm part when routing around it: 90 + 5 + 5 = 100mm.
Both diagrams use the same plan-view scale. The small circles locate guide and cutter at one contact position. Check their concentricity and dimensions, then retain the routed outline from the trial cut with the master template.
Match guide projection to the measured pattern stock
Choose the pattern thickness and jig arrangement for the guide projection, router-base support and clamping specified by the toolmaker. Compare a stated 6mm minimum template thickness with this panel's 5.5mm lower limit, then select stock or an alternative jig detail that meets the required minimum.
Check clearance beneath the projecting guide and support throughout the routing path. Keep the master reference and inspect the contact edge for damage or wear during repeated use so the pattern continues to produce the required outline.
FOUR LENGTHS · ONE COMPONENT SCHEDULE
Choose the sheet length from useful parts and handling
The four formats are 1220 × 2440mm, 1220 × 2745mm, 1220 × 3050mm and 1220 × 3660mm. Choose the length with the core, face requirement and quantity, and mark face-grain direction on the part layout.
The following mass calculation uses nominal 6mm thickness and the 520–900kg/m³ range across configurations, before finish and packing. Use the selected construction and measured sheet or pack mass for machine handling and freight.
Calculated bare-panel mass using the 520–900kg/m³ density range
Sheet size
Volume per sheet
Calculated mass
1220 × 2440mm
0.0178608m³
9.3–16.1kg
1220 × 2745mm
0.0200934m³
10.4–18.1kg
1220 × 3050mm
0.0223260m³
11.6–20.1kg
1220 × 3660mm
0.0267912m³
13.9–24.1kg
Compare large-blank output in the four lengths
Use 1100 × 900mm blanks, with the 1100mm side across the sheet and the 900mm side along its length. Reserve 10mm trim at every sheet edge and 3mm kerfs between blanks. Keep this fixed orientation and include any extra final-part trimming in the blank dimensions.
1100 × 900mm blanks with 10mm trim and 3mm kerf
Sheet size
Usable size
Across × along
Blanks
1220 × 2440mm
1200 × 2420mm
1 × 2
2
1220 × 2745mm
1200 × 2725mm
1 × 3
3
1220 × 3050mm
1200 × 3030mm
1 × 3
3
1220 × 3660mm
1200 × 3640mm
1 × 4
4
Three blanks need 900 × 3 + 3 × 2 = 2706mm along the sheet, within the 2725mm usable length of the 2745mm format. The 3050mm format also supplies three of these blanks. Allocate its extra length to another part or useful offcut when comparing the order's material scope.
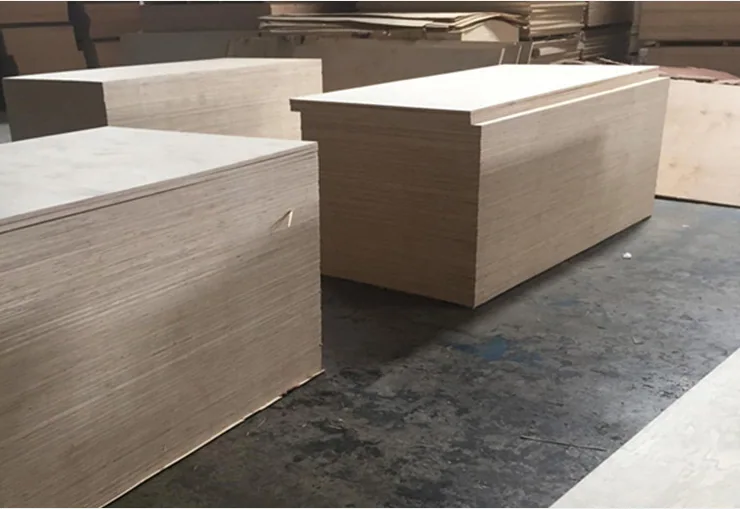
Cut plywood panels grouped in the workshop. Keep part sizes, grain direction and pack identification with the component schedule.
Plan movement and support for the chosen length
Check the machine bed, infeed and outfeed support, turning space and storage before selecting 3660mm stock. Support the long thin sheet during movement and cutting, with its useful yield and handling requirements considered together.
Preserve reference faces, grain direction and any matched groups after cutting. Put the drawing revision on part and pack labels so receiving, assembly and repeat orders use the same component schedule.
WORKSHOP CONDITION & COMPLETE FINISH
Prepare the panel and its support as one assembly
The moisture content for this configuration is 8–12%. Check stock condition against the workshop environment before close-fitting machining or bonding, then coordinate conditioning with the planned manufacturing process.
Store the selected length flat on level supports suited to the panel. Protect both faces from uneven wetting or heating and support long overhangs. Review flatness at the agreed material condition and in the intended supported assembly.
Include front, reverse, edges and backing
Develop coating and bonding together with the carrier, adhesive process, opposite-side treatment and edge protection. Use a finished face sample for colour and a representative full-size assembly to review support, bond and shape after the intended curing and conditioning.
Give the adhesive and finish supplier the actual substrate and use. Include bonding, emission and project-document requirements with the selected configuration. Our surface and finishing guide helps define the scope for a supplied finish.
For flooring underlayment, concrete-contact formwork or structural use, send the system requirements. We can work through support, exposure, fastening, surface and required product documents with the application brief.
A FITTED CORNER, ROUTED PART OR WORKING PATTERN
Develop the sample around the feature you need to resolve
For a fitted back or insert, combine the actual frame, panel and retainer in a finished corner. Review clearance, edge engagement, face level and the route used to install or remove it.
For routed parts, include the tightest curve, smallest aperture, edge profile and narrow bridge. A template sample should include guide contact and the resulting trial-cut outline. A bonded lining should include the backing, joints, support and complete finishing build.
Keep the selected construction, drawing revision and finished reference with the order. Compare sheets, machining blanks or finished parts at the same supplied stage, including face selection, routing and coating. Send the sizes, quantity and destination you already know; we can help complete the core, finished fit and document requirements.
PART REFERENCES, PRODUCTION CHECKS & PACKING
Keep the selected face and component detail with the order
Inspect the chosen construction against its receiving joint, machined outline or guide contact. Retain the finished sample and reference dimensions at the stage where the relevant feature is complete.
Connect inspection to the feature that controls the finished part
Check
Record to keep
What it resolves
Thickness and condition
Representative measurements, agreed range and moisture or conditioning reference.
Fit in the receiving detail and the actual section available for a template or blind feature.
Face and reverse
Face identification, appearance reference and intended coating.
Which repairs and grain variations remain acceptable after finishing.
Core and machined edge
Selected construction and a sample with the tightest curve, aperture and profile.
Local edge appearance and the integrity of the component's narrow features.
Joint or guide contact
Receiving-frame detail or template/tool combination, including measured reference dimensions.
Whether the actual assembly fits and whether the pattern produces the required outline.
Sheet and component identity
Format, grain direction, drawing revision and pack or batch reference.
Consistency from the cutting list through receiving and repeat orders.
Update the affected sample or check when a repeat order changes the core, finish, receiving frame or tool arrangement. Our production and quality process connects the selected specification with sample and delivery records.
Keep cut-part quantities, grain direction, appearance groups and pack labels with the delivery schedule. Include protective packing and handling for the selected sheet length or machined outline, then compare quotations for the same parts and included processing.
Choose the birch panel around the part your workshop needs.
Bring the visible faces, receiving joint and cut outline together, then compare sheet lengths on the same component list. We help select the core, finish and supplied processing, with a useful sample and clear cut-part quantities.
6mm Birch Plywood
Your birch face, finished joint and sheet length
Birch face, selected core and visible edges
Receiving joint, routed outline or template guide
Sheet length, grain, quantities, processing and destination
Develop a fitted corner with the actual rebate or groove and intended finish. Add the tightest curve, aperture and exposed edge for machined parts. For a routing pattern, include the guide contact and trial-cut outline; for a lining, include the support and backing.
Standard samples without special work or a logo have no sample charge; delivery is separate. Custom samples are agreed individually.
Order quantity
Our starting guidance is one container for standard sizes and 3,000–10,000 pieces for custom sizes or designs. Tell us your trial quantity.
Production
All products are made to customer order. Production takes 10–15 days; the order confirmation records the start date and production schedule. Sea transit is additional.
Payment
Where a deposit applies, our standard reference is 30% before production, with the balance after inspection and before loading. T/T or L/C terms are agreed for the order.
Shipping
Panel orders ship by container. Share your destination so we can arrange the loading plan and quote the freight separately from production.
After-sales warranty
All products include a 180-day after-sales warranty. Contact our team with the order reference and details of any product concern.
Tell us your quantity, sample needs and target delivery date. We’ll put the price, payment terms and production schedule into your quotation.
Share the material, thickness and test standard your project requires. Our factory team will help you select the product reports and documents for your purchase.
Production & inspection
We can plan production and inspection around your panel specification, with dimensional checks, recorded readings and packing photographs for your order.
We prepare packing details, pack quantities and dispatch documents for your order. Share the destination and receiving requirements so our team can help plan delivery.
Cabinet backs, removable covers, framed inserts, supported linings and routed patterns or display parts. Start with the visible faces, complete outline and the way the part is held. We help connect the birch appearance and core with the receiving joint, machining and finish your component needs.
How do I choose between this page and 6mm BB birch plywood?
Use this configuration for its ±0.5mm thickness tolerance and four 1220mm-wide sheet lengths. If your enquiry begins with a defined BB face requirement, our 6mm BB product page has its own specification. We can help select the face and construction, keeping the chosen product and limits together in the quotation.
What does the 6mm thickness tolerance mean for my joint?
The ±0.5mm tolerance gives 5.5–6.5mm before a separately specified finish. Include the coating, bedding and receiving-detail limits when setting finished clearance or face level. Send tighter fit requirements with the frame or groove drawing so we can develop the completed corner sample.
Can I order this for a 1/4-inch detail?
One quarter inch is exactly 6.35mm. Send the actual receiving dimensions and required finished range; we will coordinate the selected metric panel with that fit. The nominal 6mm description and the final coated thickness belong in separate drawing fields.
How will the panel sit in a 7mm-deep rebate?
With bare plywood seated directly on the rebate bottom, 5.5, 6.0 and 6.5mm panels sit 1.5, 1.0 and 0.5mm below the frame face. Add the actual bedding and coating build, plus rebate-depth variation, when setting the finished position. Check that complete build in the fitted sample.
Can I select a birch core and a visible reverse?
Yes. Identify the core species and layup, including birch throughout where required, with the front and reverse appearance. For visible routed edges or apertures, include a machined sample in the same construction so the face and exposed layers can be reviewed together.
Which sheet lengths are available?
The four formats are 1220 × 2440, 1220 × 2745, 1220 × 3050 and 1220 × 3660mm. Select the format with the core, face requirement and quantity. Mark grain direction and include machine-bed, handling and storage requirements for long sheets.
How much does a 1220 × 2440 × 6mm sheet weigh?
At nominal 6mm thickness the volume is 0.0178608m³. The 520–900kg/m³ range across configurations gives approximately 9.3–16.1kg before finishes and packing. Use the quoted construction and actual sheet or pack mass for handling and freight planning.
Which length gives the most cut parts?
Compare the same parts and grain direction across the formats. For 1100 × 900mm blanks with 10mm perimeter trim and 3mm kerfs, the four listed lengths give 2, 3, 3 and 4 blanks respectively. Both 2745mm and 3050mm stock give three in that fixed layout; include other parts, useful offcuts and handling when choosing the order format.
Can I use the plywood for a router template?
Select the pattern stock with the toolmaker’s thickness requirement, guide projection, base support and clamping arrangement. Check the actual thickness against those limits, then use a trial cut to review the outline and guide contact. Keep a master reference and include guide-edge wear in repeat-use checks.
How do guide-bush dimensions change the routed outline?
With a 16mm outside guide diameter and a 6mm cutter, the offset is (16 − 6) ÷ 2 = 5mm. Running inside a 90mm template opening gives an 80mm opening; running outside a 90mm circular pattern leaves a 100mm part. Use the actual tools, centred guide and trial cut when preparing your pattern.
How should I plan routed pockets, curves and exposed edges?
Include the minimum panel thickness, deepest tool reach, internal corner radii and narrow bridges in the part drawing. At 5.5mm, a 3mm feature leaves 2.5mm geometrically and a 4mm feature leaves 1.5mm. Choose the actual machining and fixing arrangement with the selected construction. For a formed part, include the radius, direction, supports and forming process in the sample brief.
How do I sample a coated insert or bonded lining?
Use the selected front, reverse and edges with the actual frame or backing, adhesive process and finish. Check a finished corner for fit and appearance, then a representative supported assembly for the way the complete build behaves. Coordinate the 8–12% supply moisture range with the workshop condition before precision machining or bonding.
How do I request samples and a factory quotation?
Send a part photo, outline or frame sketch, quantities and destination. We help select the faces, core, length and processing, then develop a fitted corner, machined outline or template sample. Available to order, with 10–15 days production, container shipping, freight terms per order and a 180-day after-sales warranty.
Share a cabinet-back photo, frame sketch, lining layout or pattern outline. We help complete the face, core and length choices, develop the sample, and quote the sheets or processed components your workshop needs.
Nominal thickness: 6mm overall plywood panel.
Thickness tolerance: ±0.5mm; 5.5–6.5mm before any separately specified finish.
Have a joint sketch, routing pattern or long-panel layout? Email it to sales@plywoodsupplier.cn. Start with the details you have; we’ll help you work through the rest.
CONTINUE YOUR PANEL SELECTION
Birch plywood grades and construction
Compare our panels
Browse the material range and compare the configurations for your order.
Optional Google Analytics and Ads cookies measure visits and enquiries. Reject keeps these cookies off; basic cookieless measurement continues. Enquiry details are never sent to Google. Privacy details.