
Plywood, MDF and melamine-faced panels can work together in one coordinated interior. Use plywood where layered edges matter, MDF for painted details, and melamine for ready-finished cabinet surfaces. We manufacture MDF and plywood substrates and supply decorative facing, so we can help bring the faces, edges and visible junctions together. Start with a room photo or the finishes you want to combine.
Oak veneer plywood Oak veneered MDF Woodgrain melamine plywood Melamine MDF Melamine colour catalogue
Choose the core and visible finish together
Plywood and MDF describe different core constructions. Melamine commonly describes a decorative facing on a wood-based panel, so it is not a third equivalent core type. A melamine-faced plywood panel and a melamine-faced MDF panel can have similar-looking surfaces while retaining different cores.
Write each component as a complete construction: core, thickness, face, back, edge and any further finish. This prevents a request for an oak board from being interpreted as natural oak veneer by one fabricator and a printed oak decor by another.
Choose the core for the component's performance and fabrication requirements, then coordinate the appearance across those choices. Our room-by-room selection guide addresses use conditions; this guide focuses on the places where different finished panels meet.
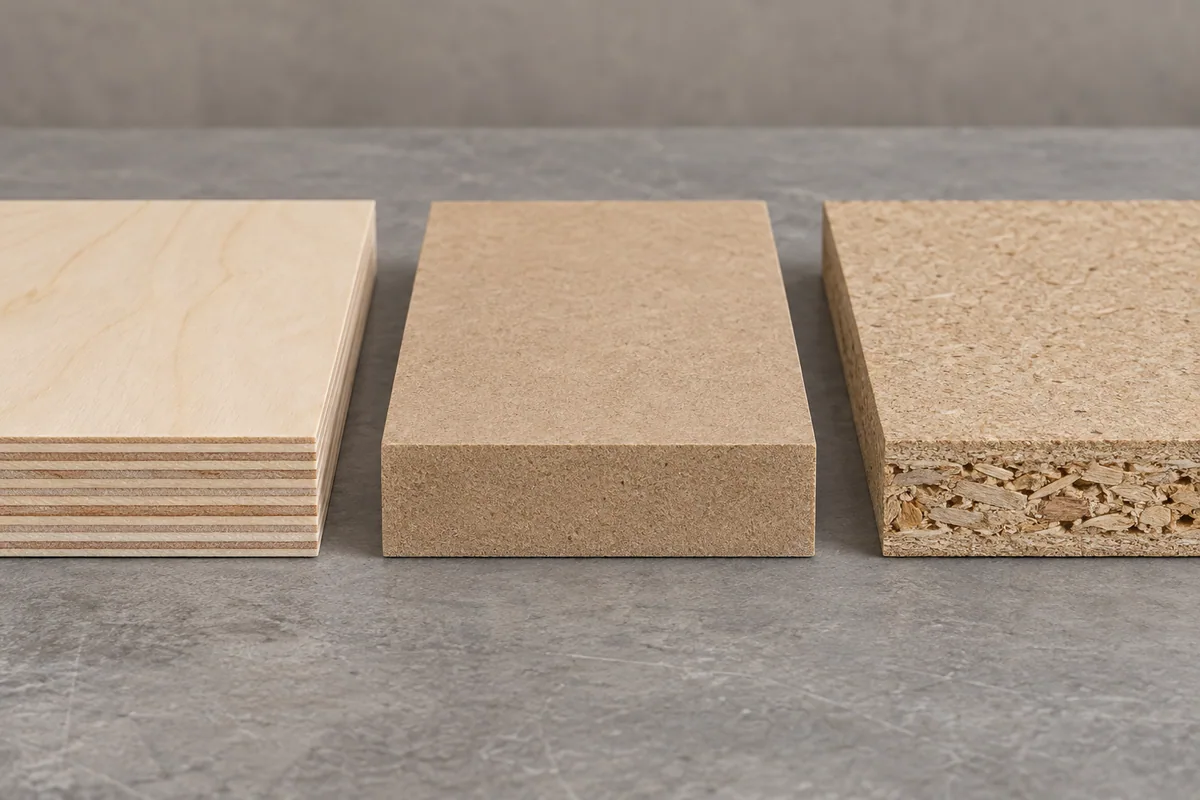
Compare samples of every product that will touch
A common colour name or decor code is a useful identifier, but a screen image cannot establish the finished match. Compare the actual faced panel, laminate, edge material and paint sample together under the lighting intended for the space.
Look at colour, sheen, texture scale and the direction of reflected light. A matte cabinet front beside a smoother return can appear different even if their base colours are close. View the samples in the installed orientations rather than only flat on a table.
Decide whether the junction needs a close match or an intentional contrast. A clear design decision is easier to specify than an undefined expectation that materials from different systems will look identical.
Coordinate natural veneer across plywood and MDF
Where veneered plywood and veneered MDF meet, specify the species, cut, veneer matching and finished colour together. Natural variation remains part of the material; selecting the same species alone does not produce a continuous grain pattern across adjoining components.
AWI's wood-paneling material requirements distinguish panel sequencing from made-to-order and end-matched sets that must be specified. This helps explain why a continuous elevation needs an explicit panel arrangement rather than a species name on an order.
Prepare an elevation with panel IDs and grain arrows. Include doors, returns and accessible panels where their appearance needs to relate to the main surface. Retain the sequence through cutting and packing.
For example, a veneered MDF cabinet door beside a veneered plywood end panel may need coordinated faces while the cabinet interior uses a plain melamine decor. Show the boundary between the coordinated visible set and the independently specified concealed surfaces.
Trial the complete paint finish on both constructions
The same paint colour does not mean two substrates need the same preparation. Assess the selected plywood face, MDF face, routed profile and exposed edge after the full proposed finishing process. Filling, sealing, sanding and coating requirements depend on those surfaces and the coating system.
The US Forest Service finishing chapter relates finish selection to appearance, cleanability and substrate properties. For a mixed-material interior, the useful comparison is the finished sample rather than the appearance of the raw boards.
Put the most visible joint in the sample: for example, a painted plywood end panel beside a routed MDF door. Inspect the corner and edge as well as the broad faces under side lighting. This reveals differences that a small paint chip misses.
Agree whether visible wood texture is acceptable or whether the design expects a uniform opaque surface. Keep that expectation connected to the preparation specification rather than assuming another coat will always hide it.
Draw the finished edge and thickness at each junction
Show the full build-up where panels meet. Include surface layers, backing, edging, lipping and any trim that affects alignment. The nominal core thickness alone cannot establish the final face position.
As a simplified geometry example, an 18.0 mm core with a 0.8 mm facing and 0.8 mm backing totals 19.6 mm before adhesive and manufacturing tolerances. Beside a measured 18.2 mm finished panel, the illustrative difference is 1.4 mm. These assumed dimensions demonstrate the coordination issue; they are not a recommended balanced construction or product tolerance.
Choose how to resolve that difference in the design: a flush face with adjusted support, a deliberate setback or a defined shadow joint. Confirm the actual build-up and tolerances before machining. A shadow joint can create a deliberate visual break, but it does not excuse an uncontrolled gap.
Specify which edges receive matching banding, natural wood lipping or an exposed layered finish. At corners, assess the edge's colour and sheen beside both adjoining faces.

Use one material schedule across the interior
A schedule connects each visible part with its construction and reference sample. Keep it consistent between the designer, panel order and fabricator. Use a short component ID that can also appear on the drawing and packing information.
| Component | Information to keep together |
|---|---|
| Cabinet front | Core, finished thickness, face sample, edge detail and grain direction |
| Exposed end panel | Visible face and return edge, alignment with the front, matching requirement |
| Wall panel | Veneer or decor reference, panel sequence, joint and perimeter detail |
| Open shelf | Both visible faces, front edge, underside finish and adjoining support |
| Cabinet interior | Decor, edge scope and the intended relationship to the exterior finish |
Do not use one sample number for visually different constructions without recording what it covers. A control sample for a veneer face does not automatically define the colour of a plastic edge or a painted profile.
Retain the reference and manage later substitutions
Identify physical samples with the component, finish and agreed revision. Record the lighting and viewing arrangement used for a critical comparison. Photographs can help locate a detail, but they should not replace the actual colour and texture references.
When a product changes, compare the replacement at the affected junction. Review thickness, edge treatment, surface texture and performance as well as colour. A visually acceptable alternative may still have different machining or cleaning requirements.
Plan adjacent panels as a group and keep their identity during installation. Retain enough information to investigate a later replacement, while recognising that new material may not match an aged surface perfectly. Natural veneer variation and changes in service should be considered when agreeing the replacement approach.
Start your coordinated panel enquiry
Start with an interior photograph, elevation or collection of finish references. Tell us which surfaces meet and whether you want a close match or deliberate contrast. Available dimensions, quantities and destination help us develop the quotation.
We can coordinate decorative plywood, veneered MDF, melamine plywood and melamine MDF with finishes supplied by others. Share your interior idea and we can help build the panel schedule and sample set.
Buying questions
Can you help match panels from a room photograph?
Yes. A photo or design image helps shortlist the appearance. We can then plan physical samples of adjoining finishes to settle colour, sheen and edges.
Can different cores share a coordinated veneer or decor?
Yes. We can plan the face finishes across MDF and plywood while retaining each component’s core requirements. Review the samples and finished thickness at their junctions.