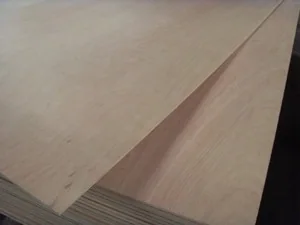
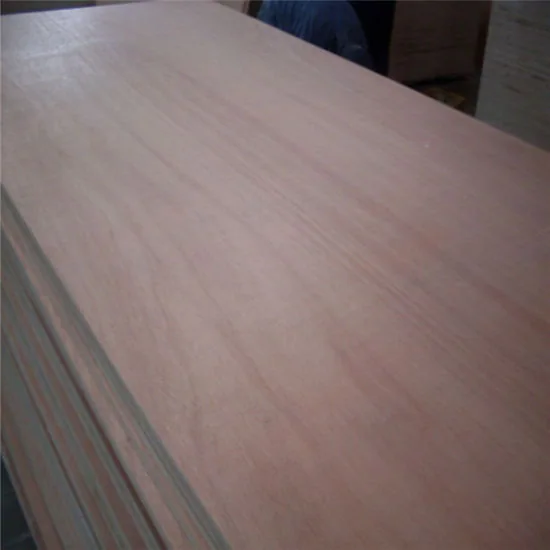
Natural Pencil Cedar faces, fitted and finished for your interior.
Bring warm wood tones to cabinet parts, framed infills and decorative interiors with our Pencil Cedar plywood. Choose 3, 12, 16 or 18mm panels, then develop the visible face, core, fitted dimensions and edge finish together. Send a room photo, furniture drawing or coated reference; our factory helps plan samples and quote the sheets or prepared parts you need.
Available to order · 10–15 days production · Container shipping
CONSTRUCTION & SUPPLY CONDITION
Pencil Cedar Plywood Sheets specification
Our product configuration and order requirements
Nominal thicknesses
3, 12, 16 and 18mm; density and tolerance identified for each construction row.
Standard sheet format
1220 × 2440mm.
Custom sheets and parts
Other sheet formats and prepared components by drawing and quotation; identify the selected construction with the custom size.
Decorative face and reverse
Pencil Cedar veneer with the appearance and finishing requirement for each visible side.
Core choices
Poplar, hardwood or birch; core species and layup specified separately from the decorative face.
Appearance grade pairs
BB/CC, C/C and C/D, with the grading basis, permitted features and visible-side selection recorded.
3mm configuration
580kg/m³ density reference; ±0.2mm thickness tolerance; 2.8–3.2mm bare-panel interval.
12mm configuration
550kg/m³ density reference; ±0.5mm thickness tolerance; 11.5–12.5mm bare-panel interval.
16mm configuration
530kg/m³ density reference; ±0.5mm thickness tolerance; 15.5–16.5mm bare-panel interval.
18mm configuration
520kg/m³ density reference; ±0.5mm thickness tolerance; 17.5–18.5mm bare-panel interval.
Moisture content
8–14% for all four rows; measurement method and inspection condition kept with the selected order.
Bonding
MR reference, with the actual service environment and required bond performance specified.
Emissions
E2, E1 or E0 requirements, with a named test method, class or limit and records for the quoted construction.
Face veneer and preparation
Veneer thickness, supplied surface and sanding or coating preparation selected for the intended finish.
Matching and visible sides
Tone range, grain direction, veneer joints, exposed reverse and adjoining-part relationship recorded with the appearance group.
Frame and finished fit
Opening, groove depths, captured edge, cut size, thickness clearance and coating state shown on the component drawing.
Edges and completed dimensions
Visible plywood edge, veneer band, solid lipping or concealed edge; final size includes the agreed net edge additions.
Supplied operations
Sheets, rough blanks or finished parts; machining, grain, permitted rotation, coating and drawing revision identified.
Documents and packing
Applicable product records, accepted samples, part IDs, protected export packing and any OEM labels linked to the order.
Supply and after-sales
Available to order; 10–15 days production, container shipping, freight terms per order and 180-day after-sales warranty.
Choose the construction, finish and size for your project. We’ll bring the selected options and finished tolerances together in your quotation.
NATURAL VENEER FOR FURNITURE AND INTERIORS
Choose the Pencil Cedar finish your joinery will show
Bring the pale to reddish character of Pencil Cedar to furniture parts, cabinet interiors and supported decorative panels. We manufacture the selected veneer on a plywood core, with the reverse, thickness and supplied work planned around your component.
Send a furniture photo, room reference or fitted detail. We can help choose the face and finish, then develop the frame, groove, edge or hardware connection that the panel will meet. Compare physical samples under the intended coating and light, including adjoining pieces where the project needs a coordinated appearance.
Identify the face and core on the order
Choose poplar, hardwood or birch beneath the Pencil Cedar decorative face. Include the required veneer identity or sourcing documents when those form part of the purchasing brief. Record that face selection with the inner construction and reverse.
Select the visible faces as a coordinated furniture set
Choose BB/CC, C/C or C/D with an agreed grading basis and permitted features on each side. Mark the face seen in the room and any reverse that is concealed, occasionally seen or equally visible.
Turn the grade pairing into a visible-face requirement
Reference
What to agree
Additional appearance choices
BB/CC
Define the BB face, CC reverse and permitted features under the chosen grading basis.
Colour selection, adjacent-panel matching and whether the reverse is acceptable when seen.
C/C
Identify the appearance allowed on each C face and the finishing requirement.
Tone, permitted repairs and figure on each visible side.
C/D
Mark the intended C face and D reverse in the component schedule.
The appearance required where the reverse becomes visible.
Review the whole visible face.The natural tone and grain belong in the appearance sample. The panel edge is a separate surface to conceal, cover or intentionally expose.
Approve the coated appearance range
Compare grain variation, veneer joints and permitted repairs under the planned coating. Choose the tone range across a door, adjoining doors or a whole cabinet run, with the edge material included in the finished corner.
For a wall or visible return, show the main viewing direction and pieces meeting at corners. Grain and reflected light become part of that appearance decision.
Define the relationship between parts
Specify consistent grain direction, coordinated tone or a more closely sequenced pattern as the project requires. Mark the intended result and part numbers on an elevation. Reserve adjoining components before cutting where their figure needs to relate, and keep the face orientation and source-sheet identity until the layout is approved.
Include the inside of an open cabinet, the rear of a door and both sides of a divider in the visible-face schedule. For reversible parts, review both working faces and the coated edge, and place labels only in the agreed locations.
THICKNESS-SPECIFIC CONSTRUCTION DATA
Choose the thickness and material condition for your part
The 3, 12, 16 and 18mm configurations carry density references of 580, 550, 530 and 520kg/m³ respectively. Thickness tolerance is ±0.2mm for 3mm and ±0.5mm for 12, 16 and 18mm. Keep each density and tolerance with its corresponding construction in the quotation.
Row references and calculated nominal sheet mass
Nominal thickness
Density
Thickness reference interval
Nominal volume
Calculated mass
3mm
580kg/m³
2.8–3.2mm
0.0089304m³
5.2kg
12mm
550kg/m³
11.5–12.5mm
0.0357216m³
19.6kg
16mm
530kg/m³
15.5–16.5mm
0.0476288m³
25.2kg
18mm
520kg/m³
17.5–18.5mm
0.0535824m³
27.9kg
The mass calculation uses a nominal 1220 × 2440mm sheet with 2.9768m² one-face area: volume = width × length × thickness, then mass = volume × that row's density. These are bare-sheet calculations. Use the selected construction's order weight and add packing for shipment planning.
Connect the thickness to its support and hardware
For a 3mm decorative infill or lining, include the receiving frame or backing that supports and retains it. For 12, 16 and 18mm furniture parts, identify the core, joint and hardware detail, including whether the component is a drawer side, fixed cabinet end or removable panel.
Record the material condition and purchasing requirements
The moisture reference is 8–14% for all four rows. Agree the inspection method and condition with the destination and fabrication process. Store and condition the selected panels for the workshop, recording their condition when close-fitting dimensions are measured.
Specify the MR bond requirement around the intended service, and record E2, E1 or E0 emissions requirements separately with the named method, class or limit. Include the requested product documents for the quoted core and construction in the order brief.
INTERIOR COMPONENTS AND FINISHED SETS
Plan the panel around the furniture you are making
Framed decorative infills
Place the Pencil Cedar face within the visible opening, then derive the cut size from the groove and capture detail. Review the coated thickness with the receiving frame, and mark the show face and grain direction before nesting.
Cabinet backs and interior linings
Identify the visible inside face and accessible reverse. Include openings, edge treatment and the groove, rebate or backing that holds the component, with the fitted dimensions carried into the part schedule.
Furniture sides and decorative ends
Coordinate the end panel with adjoining fronts and its exposed corner. Choose the thicker construction, core and surface pairing alongside the supports, connections and hardware required by the furniture design.
Wall and ceiling decorative panels
Send an elevation with panel divisions, grain, joints and attachments. Review the coating under the expected light and include the required fire, emission or other finished-system documents in the project brief.
Displays and freestanding dividers
Review the visible faces, edge, feet and attachments from normal viewing angles. A finished corner sample can bring the front, reverse and edge into the same appearance decision.
Refurbishment and replacement parts
Provide a finished reference from the installation and the locations of new pieces. Compare the offered face beside it under relevant light, then measure the actual opening and completed fit for the replacement drawing.
For flooring, marine or exposed assemblies, send the exact role, support and required properties so the construction can be selected for that duty. Explore our Marine Grade Plywood range for marine requirements, or Natural Veneer MDF when the interior component calls for a different substrate.
VISIBLE OPENING, CAPTURE AND COATED FIT
Size the inset from the receiving frame
For a frame with 600 × 900mm outside dimensions, two 45mm-wide side members and 50mm-wide top and bottom members, the visible opening is 510 × 800mm. These are the selected front-elevation dimensions for the component.
Read the worked detail and calculations
With a 6mm-deep receiving groove on all four sides and 1mm total clearance between opposite groove roots and the cut-panel dimension, a centred panel leaves 0.5mm at each root. Its required cut size is 521 × 811mm:
Frame opening and cut-panel dimensions
Dimension
Calculation
Result
Visible width
600 − 45 − 45
510mm
Visible height
900 − 50 − 50
800mm
Cut-panel width
510 + 6 + 6 − 1
521mm
Cut-panel height
800 + 6 + 6 − 1
811mm
Centred capture per edge
6 − 0.5
5.5mm
Keep the visible opening and cut panel on the drawing.The dashed outline positions the panel behind the frame. Review the groove depth and the thickness fit as separate joint dimensions.
Carry the captured edge into the part schedule
The width between groove roots is 510 + 6 + 6 = 522mm. The 521mm panel leaves 1mm total, or 0.5mm per side when centred, with 6 − 0.5 = 5.5mm engagement behind each opening edge. The same calculation applies vertically.
Choose the actual clearance for the panel, frame, finish, assembly and service conditions. Put any changed allowance into the cut-panel drawing before calculating sheet quantities, and assess the frame and joint for their intended duty.
Check the groove against the finished thickness
The 3mm construction's ±0.2mm tolerance gives 2.8–3.2mm bare thickness. With a selected 0.10mm coating on each broad face in the groove region, the finished interval is 3.0–3.4mm. Using a constant 3.60mm groove gives:
Thickness fit using a selected 3.60mm groove
Panel condition
Thickness interval
Total thickness clearance
Bare 3mm panel at the ±0.2mm reference
2.8–3.2mm
0.40–0.80mm
With the selected 0.10mm coating on each face
3.0–3.4mm
0.20–0.60mm
These gaps are the groove width minus the full panel thickness. The calculation holds the groove at 3.60mm; include its actual variation, coating build and joint condition in the production fit check. Record whether the finish enters the groove or the captured edge is supplied differently, so the measured part matches its assembly condition.
PART SIZE, GRAIN AND PURCHASED SHEETS
Compare the sheet formats for the same inset
Use the 521 × 811mm cut panel with grain along its 811mm dimension and along the purchased sheet length. This comparison uses 10mm edge trim on all outside edges and 3mm kerf between blanks in regular fixed-direction grids.
Read the worked detail and calculations
The listed 1220 × 2440mm format leaves 1200 × 2420mm usable. Two pieces across and two along give four blanks. Three 811mm lengths and two kerfs need 2439mm, exceeding that usable length by 19mm.
For a requested custom 1250 × 2500mm format, the same trimming leaves 1230 × 2480mm, enough for two across and three along. Include this custom size and the selected construction in your enquiry so the quotation can compare that six-piece route with the listed format.
4 blank positions on the listed format.The 811mm grain direction follows the sheet length, with two complete rows inside the trimmed area.6 positions on the requested custom format.The larger rectangle fits three rows in the same direction. Request the format and construction together in the quotation.
Fixed-direction layouts for the 521 × 811mm inset
Purchased format
Usable rectangle
Across × along
Geometric positions
1220 × 2440mm
1200 × 2420mm
2 × 2
4 per sheet
Requested custom 1250 × 2500mm
1230 × 2480mm
2 × 3
6 per sheet
Keep the frame engagement in the cutting dimensions
Three 800mm lengths and two 3mm kerfs fit within 2420mm, but 800mm is the visible opening height. The specified inset is 811mm high to provide capture behind the top and bottom members. Carry that complete cut size from the joint drawing into the schedule, identifying opening, bare-panel and finished-part dimensions.
Plan the complete 30-panel quantity
For 30 inset panels, the four-piece grid needs eight sheets with 32 positions. The six-piece custom grid needs five sheets with 30 positions. These counts are before face selection, setup pieces and spares.
Sheet input for 30 panels before selection or spare allowances
Layout option
Sheets needed
Positions / surplus
Purchased panel area
1220 × 2440mm
8
32 positions / 2 surplus
23.8144m²
Requested custom 1250 × 2500mm
5
30 positions / 0 surplus
15.6250m²
The required blank area is 30 × 0.521 × 0.811 = 12.675930m². The listed-format layout purchases 23.8144m²; the requested custom route purchases 15.6250m². Keep net part area and whole-sheet input separate in the quotation.
Using actual quotations for the same construction and appearance, eight listed-format sheets and five custom sheets have equal panel purchase cost when the custom sheet price is 8 ÷ 5 = 1.60 times the listed-format sheet price. Include MOQ, cutting, freight, useful remnants and spare requirements in the final purchasing comparison.
Allocate the accepted faces before releasing the layout
Map permitted features, pairs and matching groups onto the cutting plan. Identify whether a part may turn 180 degrees or move to another position while preserving the intended grain relationship. Keep source-sheet and part labels through finishing so the accepted component set can be checked together.
FACE, EDGE AND COMPLETED DIMENSION
Choose the edge as part of the finished furniture
Complete the Pencil Cedar face with visible plywood layers, a veneer band or solid timber lipping. Select the appearance and dimension of that edge before the finishing trial.
Choose the edge as part of the completed component
Edge approach
Appearance decision
Dimension and process decision
Visible plywood layers
Accept the exposed core appearance and coated edge sample.
Inspect the selected core at a cut edge and approve its finished appearance.
Veneer edge band
Coordinate veneer tone, grain and the joint to the face.
Include the net finished addition and the banding/trimming stage.
Solid timber lipping
Compare solid edge and veneer face under the proposed coating.
Define finished lipping size, joint detail and machining sequence.
Concealed groove or rebate
Identify which edge areas remain visible at the frame.
Check panel outline, thickness, finish and required clearance together.
Compare the face, edge material and adhesive joint as a finished corner under the proposed coating. Include masking and permitted overlap for a painted edge beside a clear face, or retain the preparation and stain sequence for both surfaces.
Size the substrate around the finished edge
State the final component width and length and the net edge addition after trimming and finishing. Derive the core cut size from those dimensions, keeping rough machining allowances separate. For the 521 × 811mm grooved infill, review any added edge covering against both the outline and the thickness entering the groove.
CUTTING, SURFACE PREPARATION AND ASSEMBLY
Keep the selected face through the workshop
Identify and support the working face
Mark the face, reverse, grain and part reference on the schedule. Support the panel and trial the tooling on the selected core and veneer. Inspect the entry and exit of the cut, including a visible reverse, and keep the successful tool condition and process with the component record.
Preserve the veneer during preparation
Agree the supplied surface, required face thickness and sanding sequence with the finish. Review marks, repairs and raised areas using that preparation method. Keep the full panel thickness separate from the face layer available for finishing.
Trial the complete coating
Compare clear, stained or painted samples with the intended preparation, sheen and drying sequence. Include repairs, edge transitions and any coated area entering a groove. Retain the coating products and process with the approved sample for repeat production.
Machine the actual joint and hardware detail
For 12, 16 and 18mm parts, specify hole or groove position, depth and the measuring face. Review remaining material and hardware with the selected construction. For 3mm infills, identify the frame or backing that carries the attachment and check exposed core areas before assembly.
Include reverse treatment, edge preparation and curing conditions in the component record. Keep panels supported, protected and grouped during storage and finishing. Retain part labels when work is interrupted so each face returns to the correct furniture set.
FACE-TO-EDGE APPEARANCE AND FITTED JOINT
Develop the sample around your next purchasing decision
Start with a photo, fitted detail or finish reference. We can combine the proposed face and reverse with the edge and coating, then include the receiving groove or frame to check the actual selected thickness.
Appearance and finish sample
Include the representative veneer range, permitted features and edge material. Retain an unfinished comparison area where useful, with the preparation, coating product, colour and sheen recorded for the accepted result.
Component and joint sample
Review the cut outline, edge addition and groove with the supplied and finished dimensions identified. Include coating, lipping and clearance in the fit check, then compare the assembled transition with the appearance sample.
Choose a larger area or group where colour coordination and sequence matter. Link the accepted sample to the face pair, core, thickness, finish and drawing revision so it can guide production and inspection.
Bring the supplied work into the quotation
Send the thicknesses, quantities and listed or custom format required. Identify sheets, blanks or finished parts, including grain, permitted rotation, machining, edge treatment and labels. Add destination, delivery window, packing preferences and any OEM marking; we can confirm the construction, MOQ, sample arrangements and timing in the quotation.
Our custom-size service supports the component schedule, and our production and quality information connects the selected construction to inspection. You can begin with the drawings or dimensions already available.
THE SELECTED COMPONENT AND ITS ORDER IDENTITY
Carry the accepted face and fit through delivery
Check the panel and part against the quotation, approved sample and drawing. Keep appearance, thickness, core and requested documents with the same order and pack identity.
Product-specific acceptance checks for Pencil Cedar plywood
Check
Compare against
Record separately
Face and reverse identity
Selected Pencil Cedar veneer and agreed grade pairing.
The visible side and any exposed reverse on each component.
Colour, grain and permitted features
Representative coated range and matching requirement.
Natural variation versus a feature outside the accepted scope.
Thickness and fit
The correct thickness-row tolerance and component drawing.
Bare and finished measurements, including condition and locations.
Core and edge
Quoted poplar, hardwood or birch construction and edge detail.
Any issue revealed by machining or visible at the completed edge.
Bond, emission and required documents
Named requirement and evidence for the offered construction.
The applicable product scope, method and order reference.
Set and delivery identity
Part schedule, grain direction, pack labels and order quantities.
Changed configurations, mixed thicknesses and staged delivery groups.
Record the sheet, side and feature location with a full-face view and close-up for an appearance issue. For a dimensional issue, include the measuring position, instrument and material condition. Retain an unfinished reference from the identified material alongside the coating record where useful for tracing a change after processing.
Keep groups identifiable at receiving
Match pack labels and quantities to the room or cabinet set, preserving thickness, face pair and any agreed re-sorting or substitution record through cutting. For staged deliveries, identify the parts that must coordinate and when they are needed. Review proposed material or process changes against the accepted appearance, dimensions and document requirements before adding them to the order.
PLAN YOUR PANEL ORDER
Bring the wood finish and fitted component into one order.
Work with our factory on the visible face, selected thickness and core, receiving frame and finished edge. We connect these choices to a component sample and a quotation for the sheets or prepared parts your workshop will use.
Pencil Cedar Plywood Sheets
Your visible surfaces, fitted dimensions and supplied work
Visible Pencil Cedar face, reverse and finish reference
Thickness row, core, frame fit and completed dimensions
Grain, quantities, machining, packing and destination
Compare a corner with the actual face, reverse, edge material and coating. Add the receiving groove or frame to check fit, then review adjoining parts as a group where colour and sequence matter.
Standard samples without special work or a logo have no sample charge; delivery is separate. Custom samples are agreed individually.
Order quantity
Our starting guidance is one container for standard sizes and 3,000–10,000 pieces for custom sizes or designs. Tell us your trial quantity.
Production
All products are made to customer order. Production takes 10–15 days; the order confirmation records the start date and production schedule. Sea transit is additional.
Payment
Where a deposit applies, our standard reference is 30% before production, with the balance after inspection and before loading. T/T or L/C terms are agreed for the order.
Shipping
Panel orders ship by container. Share your destination so we can arrange the loading plan and quote the freight separately from production.
After-sales warranty
All products include a 180-day after-sales warranty. Contact our team with the order reference and details of any product concern.
Tell us your quantity, sample needs and target delivery date. We’ll put the price, payment terms and production schedule into your quotation.
Share the material, thickness and test standard your project requires. Our factory team will help you select the product reports and documents for your purchase.
Production & inspection
We can plan production and inspection around your panel specification, with dimensional checks, recorded readings and packing photographs for your order.
We prepare packing details, pack quantities and dispatch documents for your order. Share the destination and receiving requirements so our team can help plan delivery.
Develop cabinet parts, framed infills, furniture linings and decorative interior panels around the Pencil Cedar appearance. Send the visible surfaces, support or receiving frame, intended finish and attachment details. We help choose the construction and sample for the complete component.
What does Pencil Cedar identify in the panel?
It identifies the decorative veneer face. Choose poplar, hardwood or birch for the internal plywood construction and record the selected layup with the order. If your purchase needs a botanical identity, veneer origin or sourcing record, include that requirement with the appearance brief.
Is Pencil Cedar the same as Okoume?
We offer them as separate veneer selections with their own configurations. Compare the proposed coated faces, cores and component requirements when considering an alternative. The accepted sample and quotation should identify the actual veneer and construction being supplied.
Which thicknesses and sheet formats can I order?
The range has 3, 12, 16 and 18mm configurations in 1220 × 2440mm sheets. Send other dimensions or a component list for custom supply. A 1250 × 2500mm format is shown in the cutting comparison as a custom enquiry option with its construction specified in the quotation.
How do the density and thickness tolerance vary?
The 3mm row has a 580kg/m³ density reference and ±0.2mm tolerance, giving 2.8–3.2mm. The 12, 16 and 18mm rows use 550, 530 and 520kg/m³ respectively, each with ±0.5mm tolerance: 11.5–12.5, 15.5–16.5 and 17.5–18.5mm. Keep the selected core and row together when planning fit or weight.
What is the weight of a 1220 × 2440mm sheet?
Using nominal thickness and each row’s density reference, the calculated bare-sheet masses are about 5.2kg at 3mm, 19.6kg at 12mm, 25.2kg at 16mm and 27.9kg at 18mm. Use the selected construction and actual shipment information, including packing, for handling and freight planning.
How should I choose BB/CC, C/C or C/D?
Define the appearance allowed on each face under the chosen grading basis. Mark the room-facing surface, exposed cabinet interior and any reverse seen when a door opens. Include permitted repairs and the intended coating in the sample, with tone and matching agreed alongside the grade pair.
Can adjoining panels have coordinated colour or continuous grain?
Yes. Identify coordinated tone, common grain direction or a sequenced pattern as the relationship you need. Mark positions and top directions on the elevation, reserve matching parts before cutting, and retain their identities until the finished group is approved.
How do I derive the cut size for a grooved infill?
For the illustrated 600 × 900mm frame with 45mm side members and 50mm top and bottom members, the opening is 510 × 800mm. Adding 6mm groove depth at each edge and subtracting 1mm total end clearance per axis gives a 521 × 811mm panel. When centred, each edge has 5.5mm engagement and 0.5mm clearance to the groove root.
How does coating affect a 3mm panel’s groove fit?
The bare-panel range is 2.8–3.2mm. With a selected coating build of 0.10mm on each face, the range becomes 3.0–3.4mm. In a selected 3.60mm-wide groove, total thickness clearance is 0.40–0.80mm bare or 0.20–0.60mm coated. Include the actual groove limits, coating condition and assembly requirements in the production detail.
Why does the cutting comparison give four or six inset panels?
For 521 × 811mm blanks with grain along the 811mm dimension, 10mm outer sheet trim and 3mm kerfs, a 1220 × 2440mm sheet gives four positions. Three 811mm lengths plus two kerfs need 2439mm, which is 19mm longer than the trimmed 2420mm length. The requested custom 1250 × 2500mm format fits six in the same direction.
How should I compare quotations for thirty inset panels?
The stated layouts require eight standard sheets with thirty-two positions, or five custom sheets with thirty positions. Their purchased areas are 23.8144m² and 15.6250m²; the thirty required blanks contain 12.675930m². For sheet purchase cost alone, the routes break even when the custom sheet price is 1.60 times the standard price. Compare actual quotations for the same construction, accepted face areas, processing, freight and spare requirements.
Can I shorten the infill to 800mm to fit another row?
The 800mm dimension in this frame is the visible opening. The 811mm cut height includes the required material behind the frame. Use the approved joint detail when preparing the cutting schedule; a change to capture or clearance is a component design change, and the fitted sample should follow the revised drawing.
How should I specify an exposed or banded edge?
Choose visible plywood layers, veneer banding, solid lipping or a concealed edge with the furniture design. Compare the actual face and edge under the coating. State final dimensions and the net finished edge addition, then derive the core blank and machining allowance from those dimensions.
How do I plan sanding, machining and the finish?
Set sanding around the selected face veneer thickness and supplied preparation. Trial the tooling on the chosen core, including cut exits, veneer joints and exposed edges. For thicker components, include the actual hole or groove drawing and hardware; for thin infills, develop the frame or backing attachment. Retain the coating sequence and finished fit with the component sample.
What moisture, bonding, emissions and project records should I request?
All four thickness rows use an 8–14% moisture reference. Record the measuring method and condition, then specify MR bonding separately from E2, E1 or E0 emission requirements and their test method. For CE-related project schedules or other performance needs, identify the construction, intended use and requested documents with the quotation.
What sample helps before a repeat or coordinated order?
Choose a face-to-edge corner under the intended coating, add the actual frame or fitting for assembly, and review a larger group where panel sequence matters. Keep the veneer, core, thickness, reverse, drawing revision and finish reference together. Allocate spares or staged groups with the initial order when later pieces need to coordinate.
How do I start a factory quotation?
Send a room photo, furniture drawing or finish reference with the sizes, quantities and destination you know. We help complete the selected thickness, core, face pair, fitted dimensions and supplied operations. Available to order: 10–15 days production, container shipping, freight terms per order and a 180-day after-sales warranty.
Let’s plan your Pencil Cedar furniture and joinery.
Start with a room image, part outline or coated reference. Share the visible surfaces and fitting detail you know; our team helps develop the face pair, core, thickness and sample around your components.
Nominal thicknesses: 3, 12, 16 and 18mm; density and tolerance identified for each construction row.
Standard sheet format: 1220 × 2440mm.
Custom sheets and parts: Other sheet formats and prepared components by drawing and quotation; identify the selected construction with the custom size.
Have a frame detail, lipped-edge drawing or finished reference? Email it to sales@plywoodsupplier.cn. Start with the details you have; we’ll help you work through the rest.
CONTINUE YOUR PANEL SELECTION
Pencil cedar plywood
Compare our panels
Browse the material range and compare the configurations for your order.
Optional Google Analytics and Ads cookies measure visits and enquiries. Reject keeps these cookies off; basic cookieless measurement continues. Enquiry details are never sent to Google. Privacy details.