
Veneer peeling defects can affect the usable surface, core edge and bonding of your plywood parts. Uneven thickness, deep lathe checks and rough fibres need different investigations. Start with a photo or offcut showing where the issue affects your component. We connect that observation with veneer selection and preparation, then the finished-panel requirements for your next order.
Birch plywood Decorative plywood Custom panels and parts
Locate the veneer feature that affects your part
For a buyer’s concern, first mark the feature on the component or offcut and include a scale in the photograph. The production investigation then follows the log group, nominal veneer thickness, machine run, time and ribbon location, distinguishing features seen after peeling from those first noticed after drying.
| Observation | Useful comparison | Avoid assuming |
|---|---|---|
| Thickness variation | Across the ribbon and through the peeling run | The feed setting equals measured thickness everywhere |
| Lathe checks | Depth, spacing and veneer side | A smooth-looking face has no subsurface checks |
| Rough or torn surface | Wood features, tool condition and conditioning history | More adhesive will correct damaged wood |
| Splits or waviness | Condition before and after drying | Every defect originated at the lathe |
Use these observations as investigation routes, not automatic diagnoses. Several process changes can produce a similar visible symptom.
Prepare the wood for a consistent cut
Log conditioning changes the material presented to the knife. Species, block diameter, initial condition and the conditioning method belong in the comparison. The temperature of the surrounding water or air is not a complete description of the condition throughout a block.
A birch veneer study by Rohumaa and colleagues compared two soaking temperatures and found differences in roughness, lathe checking and surface integrity. It supports treating conditioning as a measurable influence; it does not supply a universal temperature recipe for every species and veneer thickness.
When evaluating a change, retain the original conditioning record and compare like material. If a different log group enters the trial at the same time, an apparent improvement cannot confidently be assigned to the new setting alone.
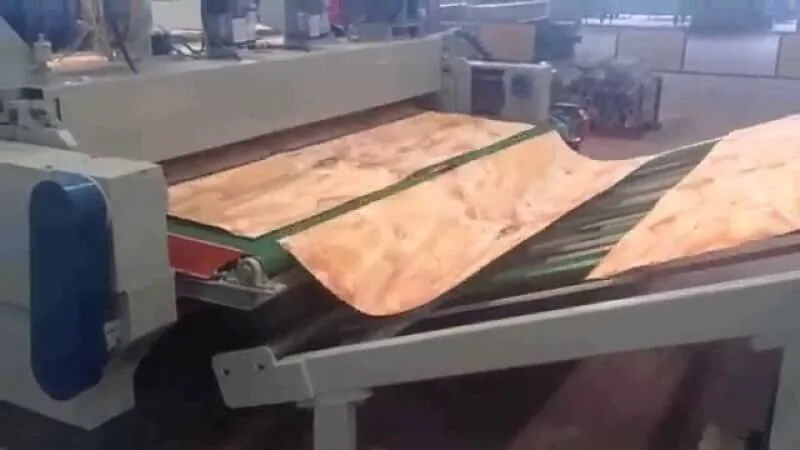
Recover veneer with useful thickness and surfaces
Positioning a block to recover useful veneer and controlling the cut as its diameter decreases are related but separate tasks. Good recovery does not by itself demonstrate acceptable thickness or surface quality throughout the ribbon.
Review knife geometry and pressure-bar adjustment against the lathe’s procedures when investigating veneer thickness, cracks or waviness.
Use the equipment manufacturer's procedures for adjustments. A clearance angle copied from another lathe is not a complete setup instruction. Record which setting changed, its previous value and the material processed, so that a successful trial can be repeated and an unsuccessful one traced.
Check thickness across the peeled veneer
Define where and how thickness will be measured. Compare locations across the ribbon width and samples from different stages of peeling. Keep wet and dried measurements identified separately because they describe different material conditions.
An investigation sheet can list nominal thickness, individual readings, range, sampling location and instrument. Recording local thin areas as well as the average shows whether the veneer can support the specified face or core construction.
For example, two runs can have the same mean thickness but different distributions. One may contain more areas outside the agreed range and therefore create more grading losses. Set acceptance against the relevant veneer requirement, rather than choosing a numerical limit after seeing the result.
Understand how lathe checks affect bonding
Rotary cutting can produce lathe checks on the loose side of a veneer. Their depth and orientation matter when examining a bond or interpreting a test. Surface appearance alone is an incomplete way to describe them.
In a study of lathe checks in seven-ply birch plywood bonded with phenolic adhesive, deeper checks affected shear results, and loading that opened or closed the checks produced different behaviour. Those findings explain why check orientation should be recorded; the study's experimental values are not universal acceptance limits.
For a production investigation, retain identifiable specimens and request a defined assessment method. Avoid bending every sample differently and then comparing the visible openings as if they were equivalent measurements.
Match surface quality to the veneer’s role
A surface can feel rough because of torn material, raised fibres or natural grain features. Describe the affected area and whether the condition repeats along the ribbon, across a width band or around a particular wood feature.
Compare the timing with tool service and material changes. An isolated knot-related defect deserves a different investigation from a repeated band affecting otherwise clear wood. Preserve a sample before any sanding or repair so that the original condition remains available.
Review the veneer with the intended face or core role and bonding requirement in mind. Prepare suitable surfaces consistently and regrade or exclude unsuitable material before bonding. This addresses the source of surface loss and keeps adhesive consumption meaningful.
Measure the gain in usable dry veneer
Keep the comparison narrow: one intended process change, a defined material group and the same grading criteria. Record interruptions and tool changes rather than silently combining them into one result.
Track usable veneer after the next relevant operations. Extra green ribbon is not necessarily extra saleable panel material if it produces more splits, excessive thickness variation or unsuitable bonding surfaces later.
Our veneer drying guide explains moisture distribution and redrying. Linking peeling and drying records helps distinguish an upstream defect from damage introduced or revealed during moisture removal.
Connect the veneer checks to your finished panel
Begin with the finished construction and the feature your component needs. Where an edge or machining defect matters, a photograph or offcut helps us connect the affected location with veneer quality, the chosen core and suitable sample checks.
For a technical review, identify the sheet reference and whether the observation occurs in the face, an internal veneer or a bond line. A close-up without location or scale gives less information than a small, clearly labelled set of observations.
Discuss your veneer or plywood requirement with us. We can use the intended face, core and machining requirements to clarify which material features need particular attention.
Plywood veneer quality buying questions
Can a smooth face hide veneer checks?
Yes. Rotary peeling can create checks on the loose side of a veneer. Face appearance and finished-panel bonding evidence answer different questions, so both belong in the relevant review.
What sample best shows a machining concern?
An offcut containing the affected edge or joint is useful, together with a photo of the full part. Mark the face, cutting direction and location so the comparison sample can be assessed in the same way.