
Veneer preparation for plywood shapes the face, core edge and consistency of the parts you cut from a sheet. Peeling, drying, grading and core assembly prepare each layer before bonding. Start with a component photo, current board or preferred face; we connect that result with the veneer construction and finished-panel sample for your project.
Decorative plywood Birch plywood Custom panels and parts
Choose each layer for the finished part
Begin with the face, edge and machining result your component needs. A construction schedule translates that into species, nominal veneer thickness, grain direction and the position of each layer, with appearance requirements for exposed faces and permitted repairs or joints. This makes the proposed hardwood core or decorative face a defined panel construction.
For an exposed plywood edge, the visual requirement may be stricter than for a concealed furniture component. For machining near an edge or a joint, the position of internal discontinuities can also matter. Send those details with the drawing so the veneer requirement follows the component rather than a generic face-grade label.
Keep incoming veneer lots identifiable through preparation. If two lots are combined, record the combination. Otherwise a later change in thickness variation or bonding behaviour becomes difficult to connect to its source.
Prepare veneer with a consistent cut
Rotary peeling separates veneer from a rotating block with a knife. Useful inspection points include thickness variation, splits, torn areas and surface condition. Compare readings at defined locations across representative sheets; one measurement at a convenient corner does not describe a whole bundle.
The USDA Wood Handbook chapter on wood adhesives explains the loose and tight sides created during veneer cutting. Peeling checks can affect bonding behaviour, so a smooth-looking face does not tell the whole story. Its discussion also distinguishes rotary-cut and sliced veneer rather than treating every decorative face as a product of the same cutting method.
For a recurring defect, retain samples labelled by lot and location. Record whether the problem follows a strip across the veneer, occurs around a natural defect or appears only after drying. That distinction is more useful than describing every irregularity as poor wood.
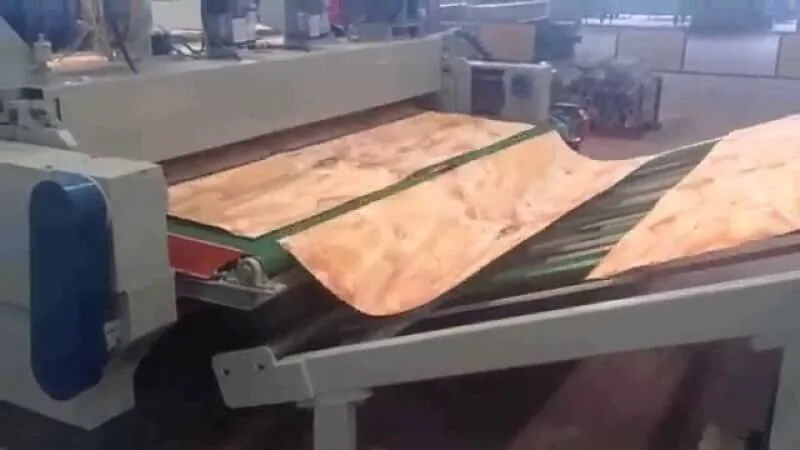
Bring veneer to a suitable bonding condition
Dry veneer to the condition needed for the actual species, thickness, adhesive and pressing route. The goal is suitable and consistent moisture, not the lowest possible reading.
Different incoming conditions can produce different drying responses. A mixed load of thin and thick veneer should not be assessed only by its average final reading. Separate the material groups that need different treatment, and identify any sheets requiring additional drying or another disposition before they reach lay-up.
Assess the condition of the veneer leaving the dryer as well as the operating setting. Drying prepares material for bonding; any separate requirement for insect resistance, biological durability or panel shape needs its own relevant evidence for the proposed product.
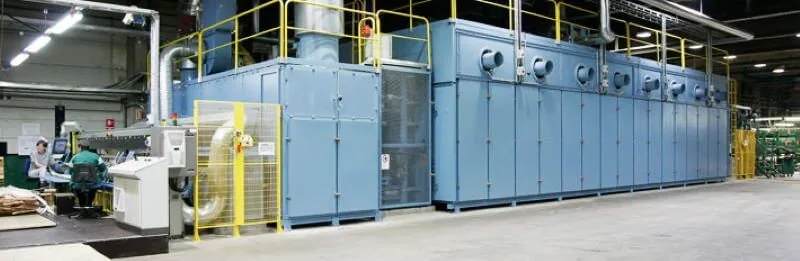
Check moisture across the prepared material
For a drying check, record the measurement method, instrument, species setting where applicable, veneer temperature and sampling locations. Identify whether the result is a local reading, a sheet average or a bundle summary. Keep those meanings distinct when results are compared between operators or deliveries.
A useful sampling sheet preserves the spread of readings, not just the average. If one group is much wetter than the rest, an acceptable mean can conceal a problem. Recheck unusual results using an appropriate reference method and established procedure rather than changing the instrument until the reading looks acceptable.
Our plywood moisture inspection guide addresses finished-panel delivery checks. Veneer measurements before bonding and finished-panel measurements after production represent different stages and should not be substituted for one another.
Match appearance and condition to each layer
| Check | What to record | Why the distinction matters |
|---|---|---|
| Appearance | Colour, grain, visible defects and permitted repairs | A visible face and a concealed core have different requirements |
| Geometry | Thickness variation, sheet size, splits and edge condition | A sheet can look attractive while fitting the lay-up poorly |
| Moisture condition | Method, distribution and disposition of outliers | A bundle average may hide unsuitable individual sheets |
| Surface condition | Contamination, damage and storage history | Visual grade alone does not establish readiness for bonding |
| Layer identity | Species, thickness group and intended position | Similar-looking veneers may belong to different constructions |
Record appearance, geometry and bonding condition separately. Veneer can then be assigned to an appropriate face or core role within the agreed specification, using suitable material efficiently while keeping the original order requirements clear.
Build core sheets that suit your edges and joints
Core composing joins suitable veneer pieces into larger sheets. Assess the specified construction and joint quality rather than treating composed cores as automatically inferior.
Inspect joint fit, alignment and local thickness. An overlap is different from an open gap and should be recorded separately. Also examine whether a joint remains intact during normal transfer to lay-up. A joint that separates while being handled creates a different condition from the sheet that initially left the composing operation.
For core or face repairs, state the permitted repair type, size and location in the product specification. Filling a visible surface does not establish that a hidden discontinuity has been repaired. Keep examples of the accepted appearance and construction with the order requirements.
Keep prepared veneer ready for assembly
After sorting, keep veneer flat, supported and protected from contamination or uncontrolled rewetting. Maintain lot identification when material is moved or split into smaller stacks. If storage conditions or waiting time change significantly, reassess the material before bonding according to the applicable process instruction.
At lay-up, confirm that the veneer supplied matches the layer schedule. Check orientation and sheet count before the next layer conceals them. Record substitutions explicitly; similar colour is not sufficient evidence that two veneers are interchangeable.
Connect a part’s surface or edge to preparation
When a finished panel shows a local ridge, hollow area or bond failure, map the defect before assigning a cause. Compare its location with core joints, repairs and veneer thickness observations. Check multiple panels from the same lot and, where useful, a neighbouring lot made to the same construction.
Bring the marked samples together with the lay-up, moisture observations and production records. Our production specification guide explains the information to keep, while the complete plywood process guide follows the material beyond this stage. To start a quotation, share your part photo, current board or intended use through our enquiry form. We help settle the face and core, then add sizes, quantity and destination as the order develops.
Prepared plywood construction buying questions
Is a composed core suitable for furniture parts?
A composed core uses joined veneer pieces. Suitability depends on the agreed construction and joint quality, especially where your part exposes an edge or includes routed joints.
Can I choose the face before choosing the core?
A face reference is a useful starting point. We then discuss the visible edges, machining and use so the panel sample includes a core suited to the complete part.