
Plan oak plywood so neighbouring doors, drawers and wall panels look right together. Start with your room photo or a sketch of the furniture, then decide where grain should continue and which edges will show. PanelSource manufactures plywood and MDF substrates and decorative facings in our factory. We help turn the oak reference into numbered parts, matched faces, finished edges and custom sizes, with samples before the full run.
Oak plywood Oak veneer MDF Custom panel sizes
Turn your oak idea into a panel layout
Begin with a furniture photo or sketch, then develop elevations showing door fronts, drawer fronts, fixed panels, openings, fillers and returns. Mark the face grain direction on each part and distinguish the primary viewing face from the reverse. Indicate whether neighbouring pieces should read as one continuous surface or as deliberately separate elements. Our oak veneer overview covers the species, cut and finish choices that feed this drawing.
Include a material schedule alongside the elevations. AWI's drawing and sample guidance identifies veneer cut, matching and orientation as information to communicate. We use these distinctions to clarify an enquiry; any required contractual standard and edition should be named separately.
Carry the grain across doors and drawers
For a three-door cabinet, number the fronts left to right and mark their installed top edges. If all three must be cut from one face layout, confirm the usable panel width and length before finalising door sizes. A cutting plan also consumes material at the saw kerfs and trimming margins. Splitting a face into three fronts removes narrow strips of grain; continuity across the finished gaps therefore needs a trial layout rather than an assumption.
Drawer stacks need the same attention. Record whether the grain should continue vertically from drawer to drawer, run horizontally across each front, or relate to adjoining doors. A later change in drawer height may shift a prominent figure into a handle hole. Keep appearance-critical parts together during cutting, edging and finishing.
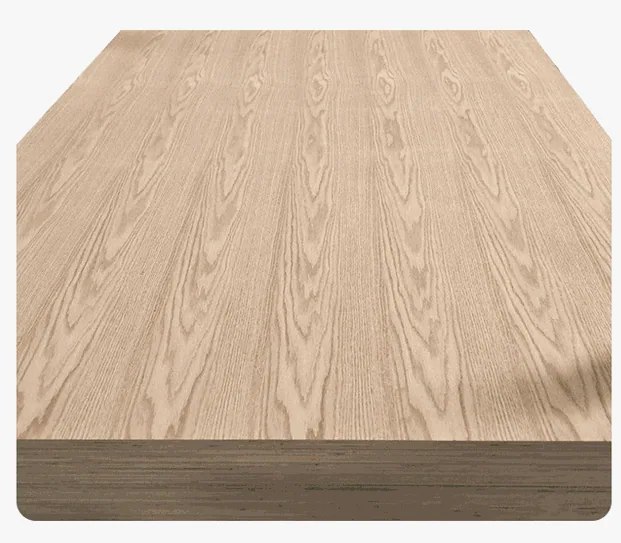
Place wall joints and corners deliberately
For a feature wall, choose the joint positions before selecting the face sequence. Mark switches, access panels, door frames and changes in plane. The visual centre of the room may be different from the centre of the available veneer face. A narrow final strip next to a door can look accidental even when the main panels are well matched.
AWI's paneling guidance distinguishes sequence and blueprint matching and discusses transitions when one veneer allocation cannot cover the room. For our quotation, identify the parts that must remain together and the locations where a change is acceptable. Do not assume panels from separate orders will continue the same figure.
Choose an edge that belongs with the oak face
The edge is a separate choice that can match or complement the oak face. Choose an exposed plywood edge, applied veneer edge, solid lipping or another specified treatment. Include edge thickness in the finished width and detail the junction at the face. An edge applied before face veneering creates a different visible junction from one applied afterwards. A small corner sample can reveal the difference more clearly than a front photograph.
For a mitred return, show the finished angle, joint location and support. A sharp corner places demanding machining and handling requirements on a thin decorative face. Specify any easing or radius and check it on the actual veneer thickness; a deep round-over may expose the substrate.
Plan the details for each oak component
| Component | Drawing decision | Sample or check |
|---|---|---|
| Adjacent doors | Numbered sequence, grain direction and finished gaps | Lay the fronts together in installation order |
| Drawer bank | Grain continuity and handle locations | Check the complete stack, not one front |
| Wall return | Corner joint, edge treatment and panel termination | Approve a finished corner section |
| Shelf | Clear span, load, support and visible front edge | Check the selected core and support arrangement |
| Access panel | Removable fixing and alignment with surrounding grain | Verify clearance and repeatable positioning |
| Curved face | Radius, direction and supporting construction | Trial the complete curved assembly |
Choose plywood or MDF around the part
The core affects machining, mass, fasteners and panel behaviour. Veneer-core plywood and oak-veneered MDF are different options, even when their visible oak faces are similar. European Panel Federation guidance discusses MDF as a veneering substrate and the importance of compatible face and back construction. Specify the reverse treatment rather than leaving a large door's back undefined.
Set any shelf-load or fire requirement for the complete panel and assembly. For a shelf, supply the unsupported span and intended load. For a curved component, do not treat ordinary oak-faced plywood as bending plywood: establish the substrate, radius, support and face assembly together. We can review these requirements against the proposed panel construction.
Price the complete set from one cutting layout
Calculate material needs from the numbered parts, allowing for edge trimming, kerfs, figure placement and any rejected appearance zones. Rotating a part may improve a cutting optimiser's yield while ruining the grain layout. Keep grain-locked parts clearly identified. Compare prices for the same accepted finished parts, including matching and spares, rather than assume the largest sheet always creates the least waste.
If the intended sheet cannot produce a continuous set, we help adjust the joint layout or panel format before ordering. Agree any change of figure at a deliberate break in the elevation.
See the joined oak finish in your room lighting
Use a sample incorporating a face joint, edge and the actual coating system. Compare it in the intended orientation and lighting; a small loose swatch does not show reflections across an entire door bank. US Forest Service finishing guidance treats appearance, protection and cleanability as separate finish-selection considerations. Keep the coating identity and preparation sequence with the sample so a later colour match does not depend on memory.
Send your oak room idea or component layout
Send your oak reference and sketch through our enquiry form. We help develop the numbered drawing and choose oak plywood, oak-veneered MDF and custom sizes. Add dimensions, quantities and destination for pricing. Include the required sequence and spare parts in the request so we can address them before production planning.
Oak panel layouts buying questions
Can oak grain continue across a set of doors?
Yes. Share the door layout so the face allocation, cutting gaps and part sequence can be planned together. Approve the fronts as a set.
Should I choose the oak edge before requesting a sample?
A preferred edge or photo is enough to start. We help develop a finished corner sample so you can compare its junction, colour and profile with the face.