
Sanded plywood surface preparation should suit the finish or bonding process you plan to use. Start with the painted part, clear-finished face or laminated panel you want to make. We help choose the plywood face and supplied condition, then compare a representative finish sample. Sanding removes material, so a useful preparation leaves enough face veneer while meeting the surface and thickness needs of the finished part.
Decorative veneer plywood Birch plywood Custom panel services
Choose the surface for the finished result
Sanding removes material. It can reduce surface irregularities and prepare a face for the next operation, but it does not establish a new bonding class, structural rating or moisture-resistance level. It cannot repair an internal void or restore a weak glue line.
Three properties need separate descriptions: surface texture, overall flatness and panel thickness. A smooth panel can still be bowed; a panel of consistent thickness can still show scratches. Use measurable requirements and a finished reference sample to agree the surface your customer will see.
The Wood Handbook's finishing chapter treats finish selection in relation to wood properties, appearance, protection and cleanability. Preparation should serve that complete surface system rather than a generic promise about sanded material.
Match preparation to the next operation
| Next process | Check before starting | Evaluate after the trial |
|---|---|---|
| Clear coating | Scratches, glue marks, repairs and colour variation | Visible grain, sheen and local marks under final lighting |
| Staining | Uniform preparation and representative face features | Colour absorption and contrast around repairs or joints |
| Opaque paint | Defects requiring filling and compatibility with primer | Show-through, edge finish and coating adhesion |
| Veneer or laminate bonding | Substrate condition, cleanliness, thickness and adhesive requirements | Bond quality, show-through and completed panel flatness |
| Accurate machining or assembly | Actual thickness range and remaining face allowance | Fits and visible edges after all finishing operations |
Abrasive grade and machine settings belong to the validated process. Choose the passes and final abrasive for the actual adhesive or coating. Follow the relevant material and equipment instructions, then compare a representative finished sample.
Check the face allowance before re-sanding
Confirm whether the face is a thin decorative veneer or another specified surface construction. Reworking a small defect may remove more material locally than intended, especially at corners and edges. Once sanding reaches an underlying layer, the original face appearance cannot be restored by further sanding.
A simple hypothetical example shows the limit: if a face started at 0.50 mm and earlier processing removed 0.15 mm, a further uniform removal of 0.20 mm would leave only 0.15 mm. Real removal is not perfectly uniform, so that calculation is not a safe rework allowance. The actual face and process need to be assessed.
Ask for the supplied face construction and discuss any planned calibration. Use the actual plywood face to decide the removal allowance; overall panel thickness alone may not reveal how much decorative veneer remains.
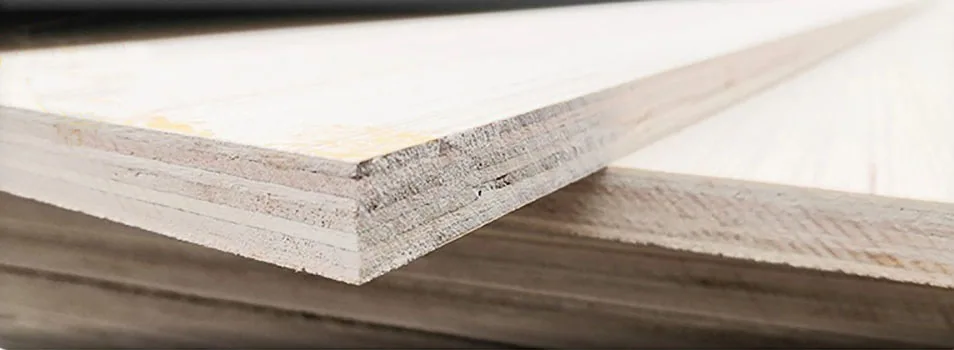
Identify a surface mark before removing material
A visible line may be a scratch, a veneer joint, glue contamination or an underlying overlap showing through. Each has a different cause and possible remedy. Inspect the face and section where appropriate, and compare the area with an unaffected part before removing more material.
| Observation | What to investigate | What sanding cannot establish |
|---|---|---|
| Directional scratches | Abrasive condition, previous scratch pattern and process | Whether the final coating will conceal them |
| Pale or shiny patch | Glue contamination, uneven preparation or face damage | That deeper removal is acceptable |
| Local ridge or depression | Surface damage versus an underlying construction feature | A repair to the core itself |
| Raised or detached face | Bond condition and affected area | A sound glue line merely by levelling the surface |
Check thickness as well as appearance
Use an agreed thickness inspection plan and record locations. Compare the measurements with the purchase tolerance, not only with the nominal label. If calibration is carried out after delivery, check whether the resulting panel still meets the component's thickness and construction requirements.
EN 324-1 provides methods for determining panel dimensions. Surface texture, bow and acceptance under a finish require their own agreed checks; a dimensional method is not a complete cosmetic inspection.
If a roughness value is required, specify the measurement parameter, instrument setup, locations and acceptance rule. Do not equate a single roughness number with a flawless clear-coated panel.
Try the actual preparation and finish
Select material that represents the face species, repairs and surface condition of the order. Record the preparation sequence, abrasive condition, equipment and dust removal. Apply the actual stain, primer or coating using its specified conditions.
Assess the sample after the required curing period and under lighting representative of the finished use. Include an edge, a face joint or another critical feature. A small central patch can miss the areas most vulnerable to over-sanding and coating build-up.
When a trial fails, change one relevant factor at a time where practical and keep the reference samples. This makes it easier to distinguish a preparation issue from a coating incompatibility or a feature of the wood itself.
Prepare for the chosen adhesive and facing
A face intended for laminate or veneer bonding needs the surface and dimensional condition required by that process. Dust, contamination and local irregularities can affect the bond or show through the added layer. Choose the final surface preparation for the adhesive system and the intended facing.
Prepare and press the chosen plywood, laminate and adhesive as one assembly. Include the balancing construction on the reverse and follow the instructions for the actual surface system.
Keep the prepared surface clean and protected
HSE recommends extraction at woodworking machines and suitable vacuum cleaning rather than dispersing dust with compressed air. Sanding may also require suitable respiratory protection alongside extraction. Select controls for the process and local workplace requirements.
After preparation, handle faces without introducing oil, glue or abrasive debris. Use clean supports and protect the panel from damage and unsuitable storage conditions before coating or bonding. A surface that passed inspection can still be contaminated during the next handling step.
Show us the finish you want to achieve
Send a photo of the finish you want, or describe a mark that appears after coating, through our enquiry form. We help choose the plywood face, supplied preparation and a useful finish sample through our customization and service options. Add sizes, quantity and destination when you are ready for pricing.
Sanded plywood finish buying questions
Can I choose plywood from a finished furniture photo?
Yes. The photo helps identify the appearance you want. Compare a physical sample with the actual stain, paint or clear coating before fixing the supplied surface requirement.
Should the finishing sample include an edge?
Yes, when an edge, corner or face joint will remain visible. These areas can respond differently to sanding and coating, so include them in the representative trial.