
Interior Plywood Cladding in New York – Acoustic Plywood Case Study
Cuzi Wood’s Customer recently completed a project for a College located in Middleton Grange, New York.
The builders for the project — Bright Star Interiors — approached us to supply custom acoustic plywood sheets for the college’s new, ultra-modern sports hall.
Find out how we helped transform the sports complex through impeccable interior plywood cladding in New York.
Briefing For The Sports Hall Project
For the initial project brief, Bright Star Interiors approached us and provided us with the architectural specifications of the project. We worked together before, so the positive experience helped us win the job.
After many years in this business we are typically able to quote very quickly. Experience really helps avoid any going back and forth between builder and supplier.
Bright Star Interiors gave us the architectural brief, and in return, we suggested the best layout and patterns for the project. We also recommenced the most suitable plywood for the job. In this case we went with our acoustic plywood, SonaPanel. Acoustic plywood is clearly the way to go in sports halls as it makes a massive difference to noise levels and echoing.
Why Acoustic Plywood Cladding?
We can custom prepare a wide range of styles, patterns and diameters for acoustic plywood panels
Acoustic plywood is necessary for basketball courts to avoid echoing, especially since adjacent to the sliding door is a seating area. People seated in the area shouldn’t hear the echoes of running and bouncing basketballs.
This calls for a much thicker plywood to avoid splitting or breaking, especially for the lower areas.
For this type of application, specifically for a basketball court, we generally go from ground level up to a certain height.
The lower it is, the more impact expected, the thicker the plywood. The higher you go, the less impact presented, the less thick the panels.
Our recommendations included specifications such as the type and thickness of plywood; options for holes, slots, diameters, spacing and perforation space.
After securing architect approval, we proceeded to prepare the materials needed for the project.
Supplying Bright Star Interiors With The Acoustic Plywood They Need
First off, we conducted a site visit. We tend to avoid taking measurements off plans, because plans don’t always reflect the actual measurements we need.
Measuring and cutting
We measured for the standard sized panels and the nonstandard panels to make sure we cut them and perforate them to fit in.
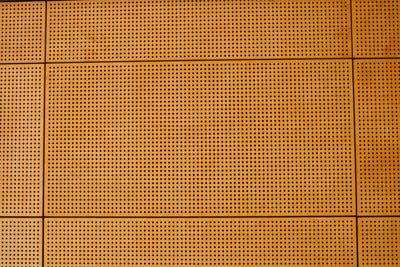
Then, we cut 18mm thick plywood perforated with 16mm diameter holes with 32mm centre spacing using a square pattern.
Secret fixing of the plywood panels
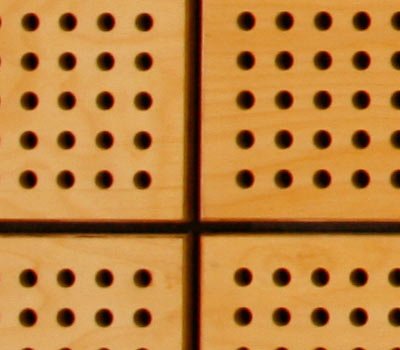
Secret fixing meant that no screws are visible on any of the panels
One of the reasons the panels look so clean is their secret fixing. This hides any screw holes from view.
In order to achieve this effect, black fabric has been bonded to the back of the panel. This way, when you look through any of the holes you simply see black, rather than the back wall or other mounted surface.
Bright Star Interiors also cut some raw plywood into strips and screw-fixed these onto the back of our acoustic plywood panels.
By fixing the plywood strips to the frame, screwing through the face of the panels became unnecessary.
Instead, they were now able to put a screw through one the panel holes into the supporting plywood strips. This way all screws are buried inside holes and are not visible.
Hence the acoustic panel stayed completely intact and the plywood strip holds the panel to the wall.
Perfectly Aligned, Varying Panel Sizes
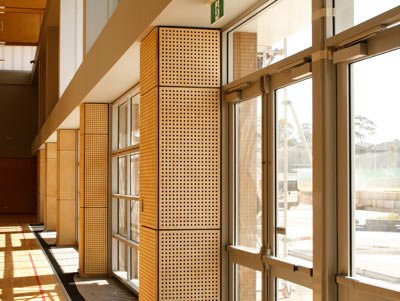
Panels for cladding the pillars were some of the more challenging elements to prepare
The most challenging part was the perfect alignment of different sizes of panels. We made most panels to the standard size of 2400 by 1200.
However, we needed to create many smaller sizes as well. This included panels for the various columns, but also panels the top of the walls and up to the ceiling.
The critical task was to ensure all the borders were lining up. In addition, we also had to make sure all the holes line up in their vertical direction, so they don’t all look staggered or random. This was particularly challenging on some of the more narrow strips. We had to adjust some of the borders, because the holes wouldn’t have been centred otherwise.
To achieve this effect, we adjusted the plywood panel borders so that the holes were always central to the panel.
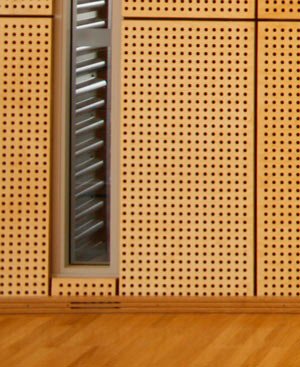
Sliding Door Design and Installation
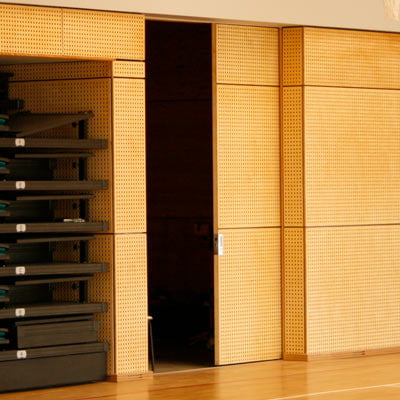
6mm specially prepared plywood overlays achieve a consistent look on the hall’s solid sliding doors
The hall also had a number of sliding doors.
To achieve the same consistent effect, we specially prepared and supplied 6 mm perforated plywood cut in the identical pattern.
The installation team then fixed these panels to the solid doors. The resulting effect is a perfect look of continuation when the door is closed.
Finishing up
After the Bright Star Interiors team installed the panels, we proceeded to measure the type of panels we would need to infill the remaining areas.
We needed to pay particular attention to the areas under the columns and on some of the end panels that went from a wall into a corner.
Even the smallest panels are aligned
With the remaining parts installed, the resulting effect was a very neat, sophisticated assembly of cladding plywood, creating a spectacular, modern sports hall.
Once they had installed the panels, the team from Bright Star Interiors then painted them with a clear lacquer. This gives the product the finishing look and added protection.
While we do supply pre-painted panels, for this particular project, the builders wanted to paint over the panels themselves.
The entire installation process took about 3 months to complete. We had supplied plywood cladding for this project with a coverage of approximately 800 square metres.